This is the second part of my first Indie Game Dev/VFX/Code Art tutorial!
Learn about how to code a 3D GLSL Cel Shader,
and what a 3D GLSL Cel Shader even is,
and why you might want to create one with code in the first place.
Start with Part 1, and then progress onto Part Two! :]
part 2 of the Cel Shader with Code Tutorial!
(made by Logan.) :]
1.
hi, I wanted to make a tutorial and show the making of my first ever 3D
GLSL cel shader. I originally made a video tutorial on vimeo and it was terrible. :P so I'm remaking it as a proper written tutorial.
this is part two of the tutorial and I've split it into two parts total.
2.
- important note: 2D shaders can make the screen strobe really fast if your values go out of a numerical range.
you may not always know what that numerical range is if you're beginning,
because it depends on the specifics of the maths in each line of code.
the process of making a 3D cel shader, in my experience, is less likely to do this, but there is always some possibility you'll enter a value that causes intense strobing until you delete a bit of code or close the code editor window, and the strobing stops.)
please check in with yourself and the people around you to make sure they're not sensitive to flashing lights before playing around with GLSL in a code editor.
3.
you will need:
- a calm and comfortable space to concentrate on the tutorial, and an hour or so to spend on it if you're fairly new to coding.
- wi-fi or LAN internet.
- your computer (a Windows computer or an Apple Mac. Linux would also likely work, but if you're on Linux, you know more Linux than me.)
(if you don't have a computer, and are on a phone or a tablet, I'll try to make a tutorial at some point to explore 2D shaders,
which can be run in a browser. there are a lot of great 2D shader tutorials out there.
I really like The Book of Shaders, tutorial webpage, made by Patricio Gonzales Vivo and Jen Lowe. it's incomplete, but it was my first introduction to coding anything, and is still a wonderful resource.
if you've never coded anything before, it's a really good place to start coding fun 2D fragment shaders, if you happen to be looking through this tutorial and thinking it looks a bit too complex.
you can find it here: thebookofshaders.com )
- the free Visual Studio Code editor program made by Microsoft. I use the downloadable version.
(a code editor is a place to type and run your code.)
- and also along the way there is the Visual Studio Code extension glsl-canvas made by circledev to download to your Visual Studio Code editor.
(this allows you to see your GLSL code visually in the editor.)
4.
5.
okay, so in the previous part of the tutorial, part 1, I got up to applying a gradient to the rubber duck example 3D sculpt.
although currently flat looking, this gradient will be key to the final effect later,
and will make the shader look a bit more custom than a typical cel shader,
and actually a bit more like a gooey, glassy, jelly almost.
6.
next, we need to go ahead and make the leap between what we've currently got,
which is a 2D fragment shader with some 3D vertex parts that aren't being displayed yet,
to a 3D vertex and fragment shader, where both aspects, the 2D effects, and the 3D rendering, are fully displayed.
this will make the duck look properly 3D.
7.
To make a cel shader, you need to get the normal vector of the surface, and you need to be getting it at each pixel,
which sounds super hard...
until you realise that previously in your code from part 1 of this tutorial,
you already calculated it somewhere in the code below.
all of the above code is the necessary rendering code, that when you know what to do with it,
and keep in mind that it's based on real world physics, so there are theoretically some constraints to it, as it is,
but you have a really cool playground to create different lighting effects and materials.
not knowing about this being a thing in GLSL, held me back for years, thinking I'd have to write all the super complex matrices.
but it's all very standard, and it's within the language itself.
10.
what we're looking to utilise here is the v_normal varying. this is just a shortened way of saying normal vector.
11.
anyway, so you make use of the v_normal calculations, and you also have to calculate the direction of the lighting in your scene.
and now, to create a cel shader, you have to calculate a dot product (a type of mathematical calculation)
of the v_normal and the lighting direction.
(if you would like to learn more about what a dot product is,
here's a cool link:
thebookofshaders.com/glossary/?search=dot )
this allows the computer to be able to continually create an updating value that represents if light is making contact with the surface of the 3D sculpture at every pixel.
12.
let's start with a line of code each, for the direction (which can be simply called direction), and then the direction and the normal vector calculations (which we can call incidence).
you can put these just before gl_FragColor.
you may have noticed at this point that the direction value, is the same as the color value.
in theory you could probably be okay with just having direction = color, in the following code,
but I've found when working with color and lighting direction, I find that, for me, splitting them up into two seperate variables can be helpful later down the line,
if you want to be doing different things with color and direction, which can be useful.
15.
to create something that's visually quite interesting,
and actually does the cel shader thing of the lighting showing only a few flat colours, in a way that isn't totally automatically based off your incidence value,
it's good to select some colours that are fairly similar to each other, so, here's the code to do that.
at this point setting the starting colour to black is also a good thing to do.
we can put this code where vec3 color was before, because we're essentially replacing that bit in the code.
and now make sure you delete the line of code that sets your default colour to fluo yellow, or whatever color you previously selected to write in your code.
18.
You may be thinking, but nothing has changed... so let's replace gl_FragColor to add incidence to gl_FragColor in a temporary way.
(in the end code, gl_FragColor will be different, but this is a good way of demonstrating something cool and quite key.)
19.
gl_FragColor = vec4(color, incidence);
20.
So at this point, your void main() code should look something like this! :]
21.
void main() {

    //cartesian coordinate system
    vec2 cartesian_coordinates =
    fract(gl_FragCoord.xy/
    u_resolution.xy) +
    fract(gl_FragCoord.xy/
    u_resolution.xy);

    //color defaults to black
    vec3 color = vec3(0.0, 0.0, 0.0);

    //some colours picked out
    //for later on in the process of
    //making a cel shader
    vec3 color1 = color;
    color1 += vec3((color_16cyan));
    vec3 color2 = color;
    color2 += vec3((color_13duskblue));
    vec3 color3 = color;
    color3 += vec3(color_10indigo);

    //color changes here,
    //very similar to direction
    //at this point in time
    color = vec3(cartesian_coordinates.x,
    cartesian_coordinates.y, abs(color));

    //direction of light
    vec3 direction =
    vec3(cartesian_coordinates.x,
    cartesian_coordinates.y, abs(color));

    //the dot product of
    //normal vector and
    //lighting direction
    float incidence = (floor(dot
    (v_normal.xyz, direction)));

    //the final composition of what is
    //actually displayed on screen
    //from the above code
    gl_FragColor = vec4(color, incidence);

}

#endif
22.
23.
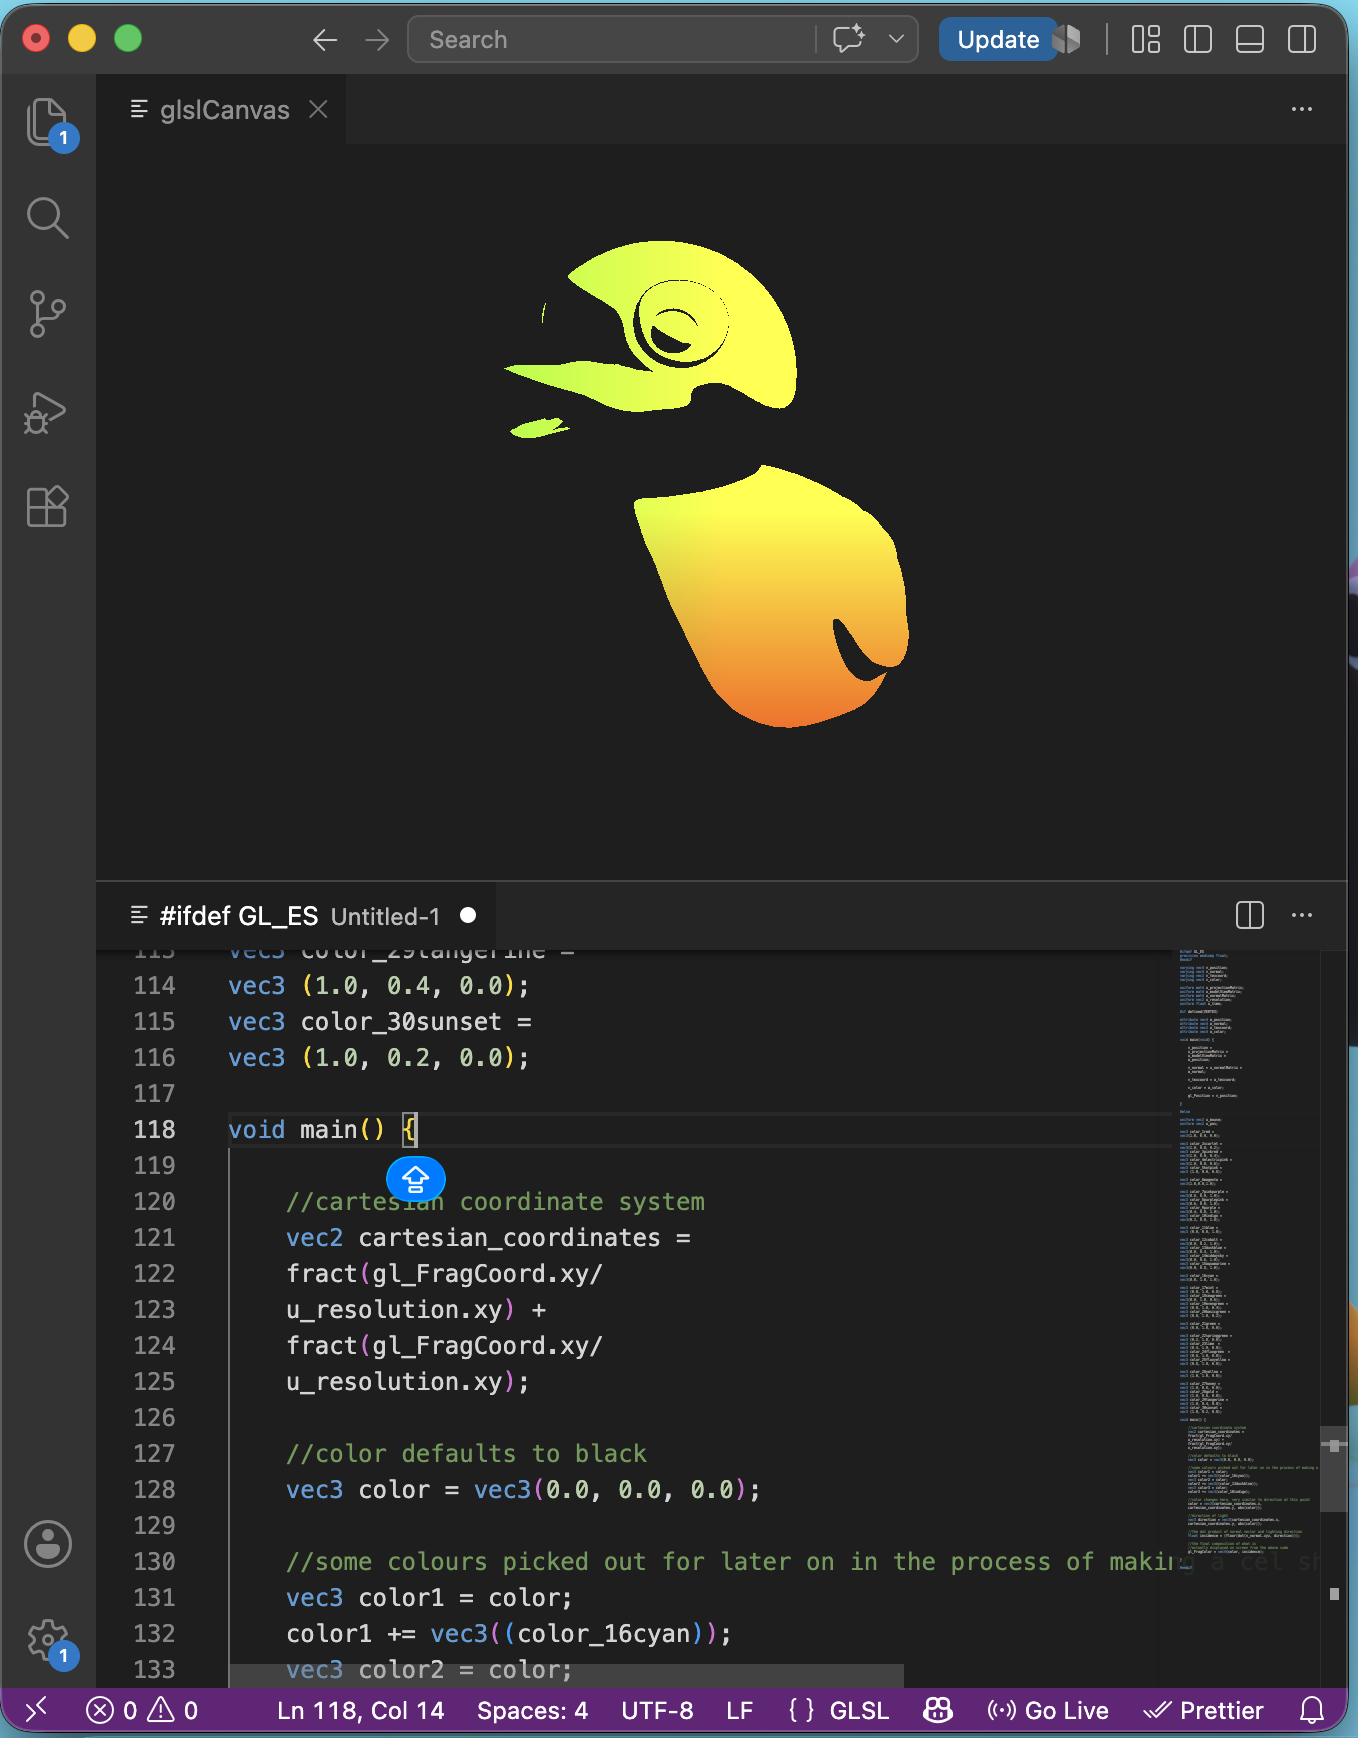
Now something cool has happened. The duck is divided into two regions. a region of light, and a region of shadow!
The reason this happens is quite simple, when you reflect on what incidence does,
and what it has currently replaced in gl_FragColor (the static value of 1.0, which you can think of as a bit like a 100% opacity.)
if incidence is calculating whether the light hits each pixel of the duck,
and incidence is feeding back a value specifying whether the light directly hits the surface of each of the duck's pixels, or just glances, or doesn't make contact at all,
and it replaces the opacity value that is usually 1.0, what is actually happening,
is that the opacity values for the whole duck are calculated so that there is a very sudden transition between light (100% opacity areas) and shadow (0% opacity areas).
meaning that although the light hasn't changed, shadows have been introduced where there is no light.
and this creates a shadow that tangibly shows the 3D curvature of the duck, and as such the duck no longer looks 2D.
this is the most exciting step in creating your first GLSL shader program, because you've gone from 2D visual effects, to 3D vertex rendering.
it doesn't look particularly special yet, but from this point onwards, things get easier.
well done! :]
24.
now, we can keep building the cel shader,
improving it to a point where it looks cooler than just soem basic light and shadow.
25.
the next step is to use those colour variables, color1, color2, color3,
and use the incidence, (the dot product of the v_normal and the light direction),
in further calculations that allow the manual selection of thresholds of colour.
26.
the thresholds will create a system where, you can choose the exact values of incidence across every pixel,
where an exact colour will appear on screen.
and although you're manually choosing which values equal which colours,
the computer will automatically calculate how to adjust this in 3D, as the duck rotates or is moved.
the code to do this is as follows,
and can be placed after declaring incidence as a float,
so just before gl_FragColor.
27.
if ((incidence) > 0.7){
	color = color1;
	direction = color1;
}
if ((incidence) < 0.3 ){
	color = color3;
    direction = color3;
} else {
    color = color2;
    direction = color2;
}
28.
what this code is doing, is evaluating in all pixels of the duck,
and if incidence is a certain value (such as more than 0.7 in the first if statement) in a particular pixel or group of pixels,
it changes the color and the direction values specifically in that area, to color1, which is cyan.
if the first if statement is correct the code is evaluated for if incidence is smaller than 0.3 in an area, that area becomes color3, which is indigo.
and if an area is inbetween those two values, color and direction are changed to color2, which is dusk blue.
29.
let's go ahead and make this slightly more complicated. we've got a fairly boring blue duck.
what we're actually aiming for here is multiple colours that all adjust as the duck rotates,
adding extra visual interest.
so let's add another set of if statements, after the current set of if statements, this time some nested if statements,
(I'll explain more on that very soon).
and between the two chunks of if segments, we'll also want to recalculate the incidence value.
30.
//recalculating incidence
//at this point in time within the code.
incidence = (floor(dot(v_normal.xyz,
direction)));

    //nested if and else statements
    if ((incidence) < 0.5){
		color = color1;
		direction = color1;
	    if ((incidence) >= -1.5 ){
		    color = color3;
		    direction = color3;
	    } else {
            color = color2;
		    direction = color2;
	    }
    }
31.
okay, so that's a nested set of if statements.
what is nesting anyway?
nested if statements are basicallly if statements with their opening brackets { ,
and closing brackets } , in a slihtly different order. the structure here is as follows:
32.
if (condition one is met) {

        any code here is performed
        if condition 1 is true;

        next, (if condition 1 is met,
        evaluate for
        if condition 2 is also met,
        and if so...) {

            ...any code here is performed
            if condition 1 and 2
            are both true;


        } this special bracket
        closes the second if statement
        here.

        else, if condition 2 isn't true,
        open up brackets with this
        special opening
        bracket symbol again {

            any code here is performed
            if condition 1 is true,
            and 2 is not true;


        then you close
        the else() statement
        with a closing special
        bracket symbol }

and now you close the first if statement
that evaluates for
if condition 1 is true, here.

}

and now the process ends,
and code continues being read as usual,
without checking for
if conditions are met,
onwards from this point.
33.
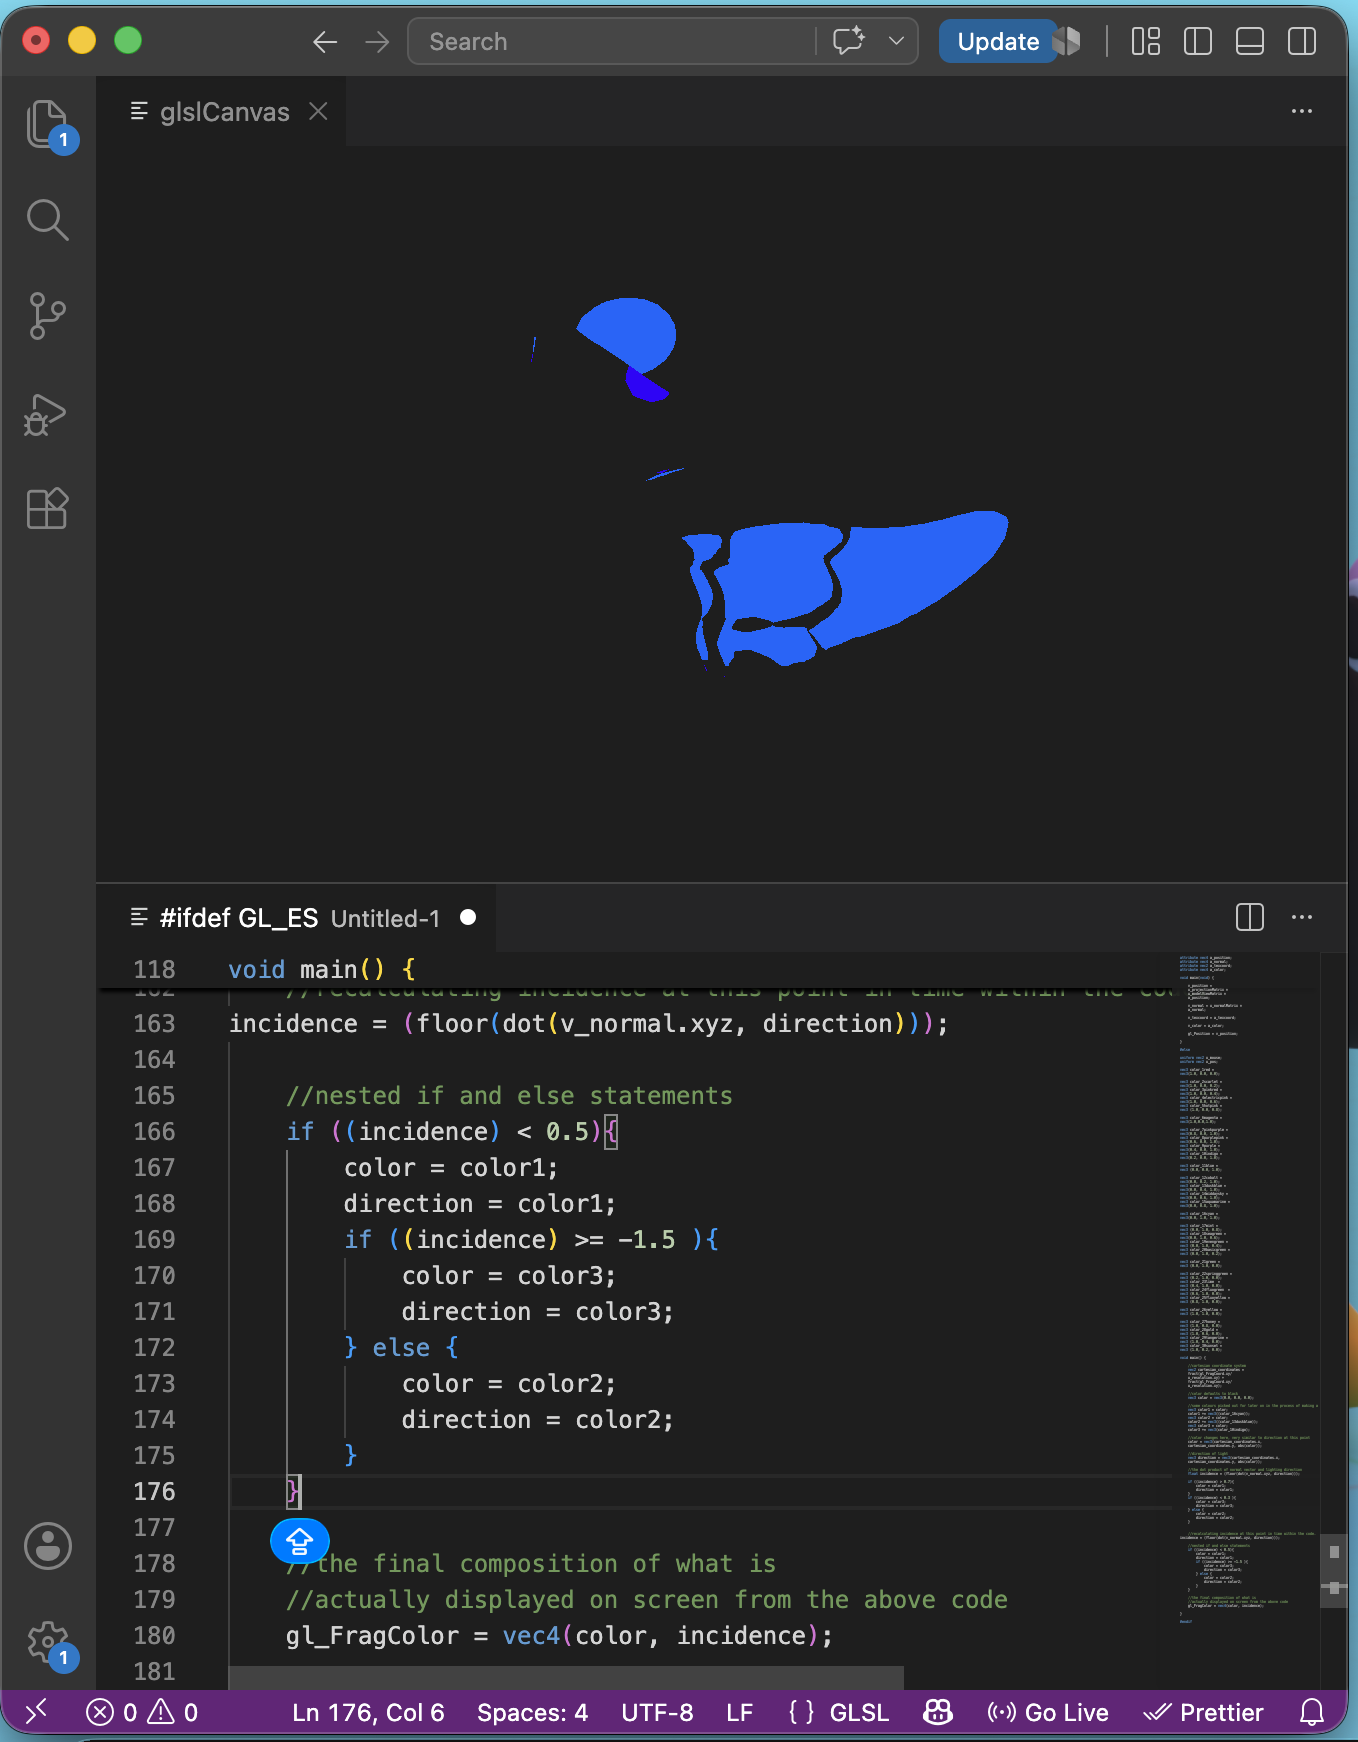
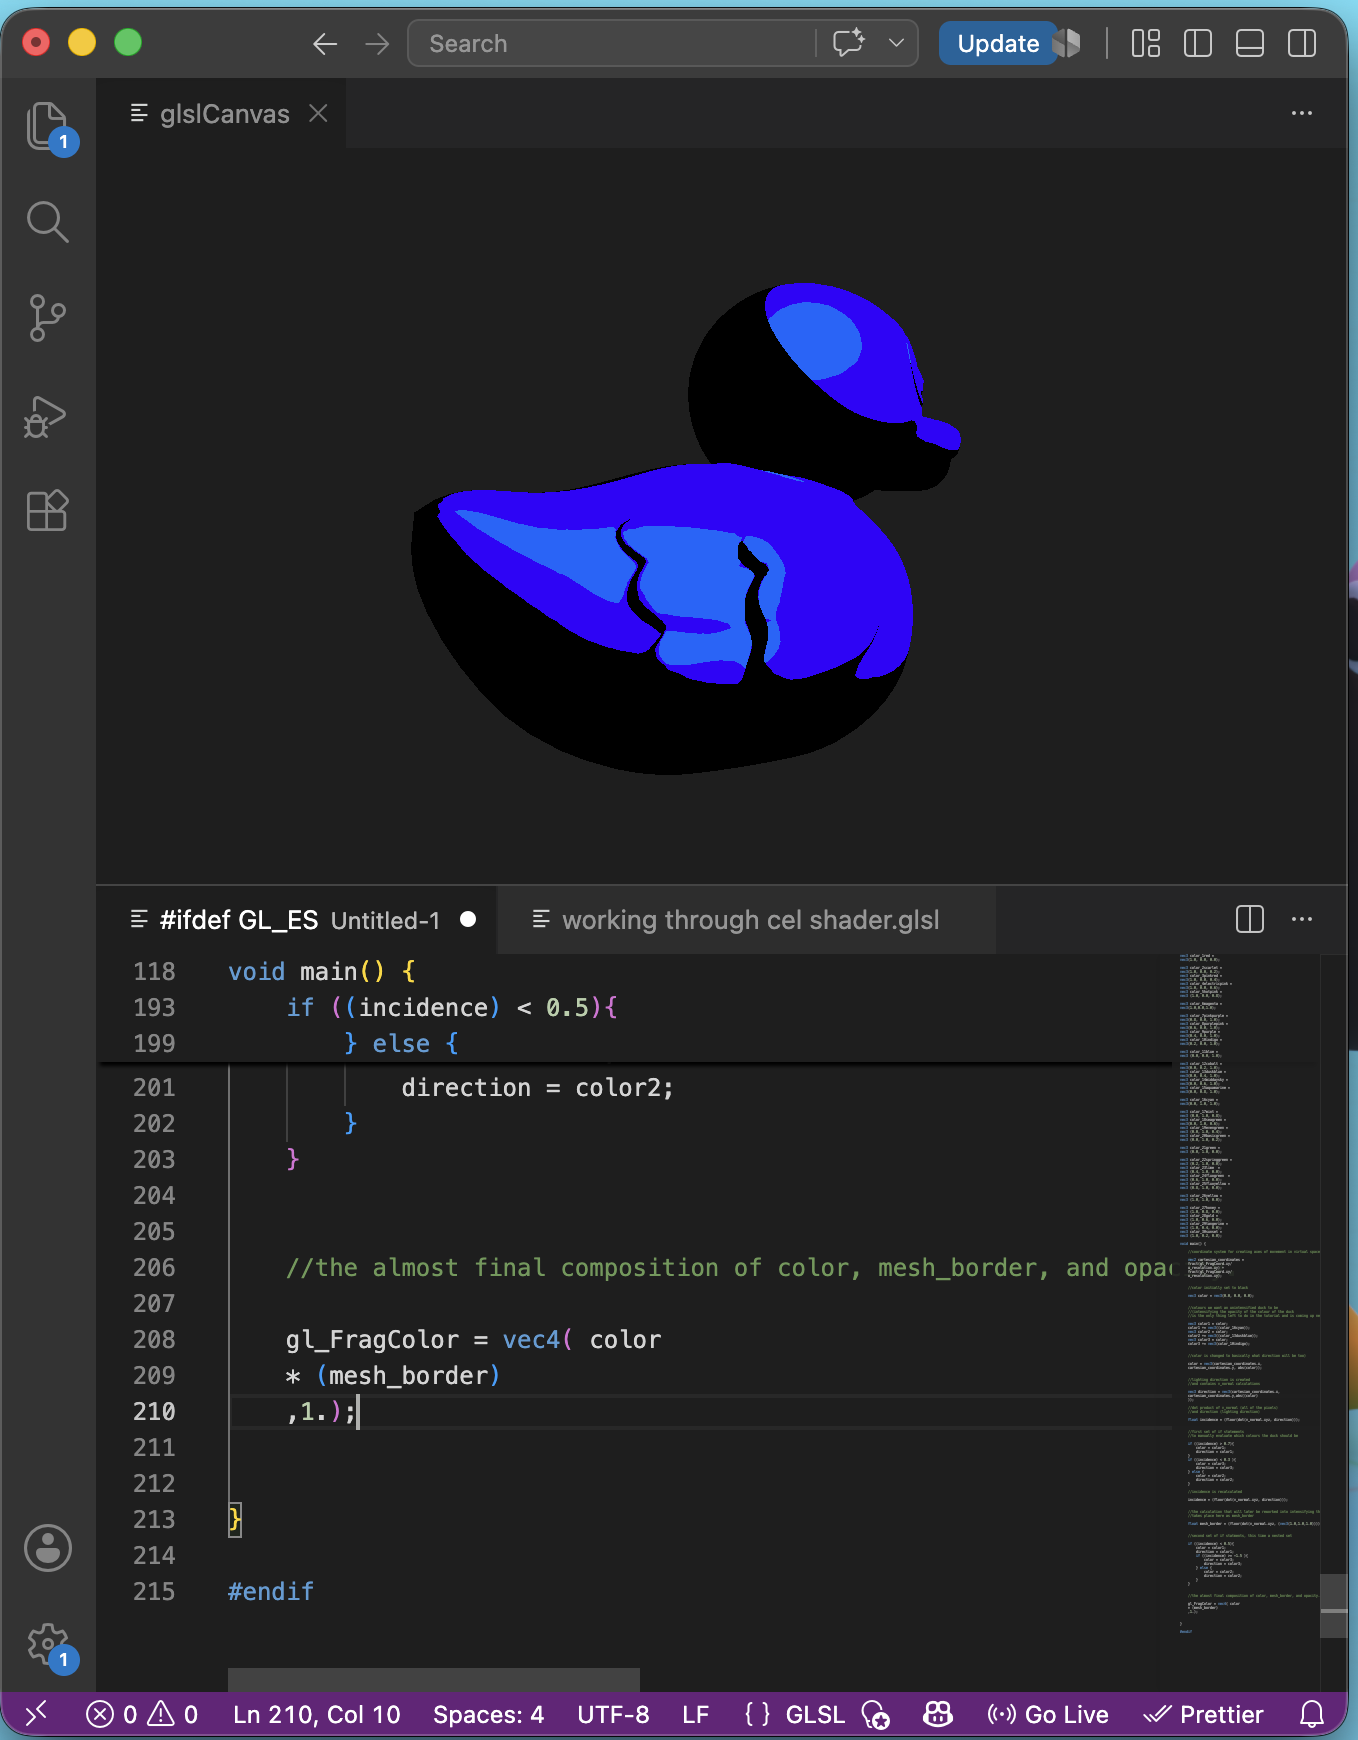
and now, your duck should look rather blue and currently quite metallic, like so.
this isn't the end effect we're looking for however, so let's keep going.
34.
35.
time for the next step; now that incidence threshhold values have been coded,
we're actually just a few of lines of code away from the finished shader.
36.
the most crucial line of code apart from gl_FragColor,
(which we're also going to change again at the end to create a cool effect),
is something I've called mesh_border. it does create a black border around the cel shader,
but it does a lot more than that, it calculates the dot product between the v_normal and direction again,
yet it will also when updated later on,
intensify the colour of the glossy glow of the duck,
creating the super cool full result at the end of the tutorial.
you can slot the following line of code on a line just before the second collection of if statements.
the penultimate thing we have left to do now is change gl_FragColor to include both color and mesh_border, and have a more generic 1.0 (which functions as 100%) opacity.
so let's do that.
39.
gl_FragColor = vec4( color
* mesh_border, 1.0 );
40.
and now, the final step in the process of creating the cel shader. but first, let's recap on how we got here, and howthe code should look, from start to (nearly) finished.
//...

void main() {

    //coordinate system for creating
    //axes of movement in virtual space

    vec2 cartesian_coordinates =
    fract(gl_FragCoord.xy/
    u_resolution.xy) +
    fract(gl_FragCoord.xy/
    u_resolution.xy);


    //color initially set to black

    vec3 color = vec3(0.0, 0.0, 0.0);


    //colours we want an unintensified
    //duck to be.
    //(intensifying the opacity
    //of the colour of the duck
    //is the only thing left to do
    //in the tutorial
    //and is coming up next.)

    vec3 color1 = color;
    color1 += vec3((color_16cyan));
	vec3 color2 = color;
	color2 += vec3((color_13duskblue));
	vec3 color3 = color;
	color3 += vec3(color_10indigo);


    //color is changed
    //to what direction will be

    color = vec3(cartesian_coordinates.x,
    cartesian_coordinates.y, abs(color));


    //lighting direction is created
    //and contains v_normal calculations

    vec3 direction = vec3
    (cartesian_coordinates.x,
    cartesian_coordinates.y,
    abs((color)
	));


    //dot product of v_normal
    //(all of the pixels)
    //and direction
    //(lighting direction)

    float incidence = (floor(dot
    (v_normal.xyz, direction)));


    //first set of if statements
    //to manually evaluate which
    //colours the duck should be

	if ((incidence) > 0.7){
		color = color1;
		direction = color1;
	}
    if ((incidence) < 0.3 ){
		color = color3;
	    direction = color3;
	} else {
        color = color2;
	    direction = color2;
    }

    //incidence is recalculated

	incidence = (floor(dot
    (v_normal.xyz, direction)));


    //the calculation that will
    //later be reworked into
    //intensifying the colours,
    //takes place here as mesh_border

    float mesh_border = (floor(dot
    (v_normal.xyz,
    (vec3(1.0,1.0,1.0)))));


    //second set of if statements,
    //this time a nested set

	if ((incidence) < 0.5){
		color = color1;
		direction = color1;
	    if ((incidence) >= -1.5 ){
		    color = color3;
		    direction = color3;
	    } else {
            color = color2;
		    direction = color2;
	    }
	}


    //the almost final composition of
    //color, mesh_border, and opacity.

    gl_FragColor = vec4( color
	* (mesh_border)
	,1.);

}

#endif
44.
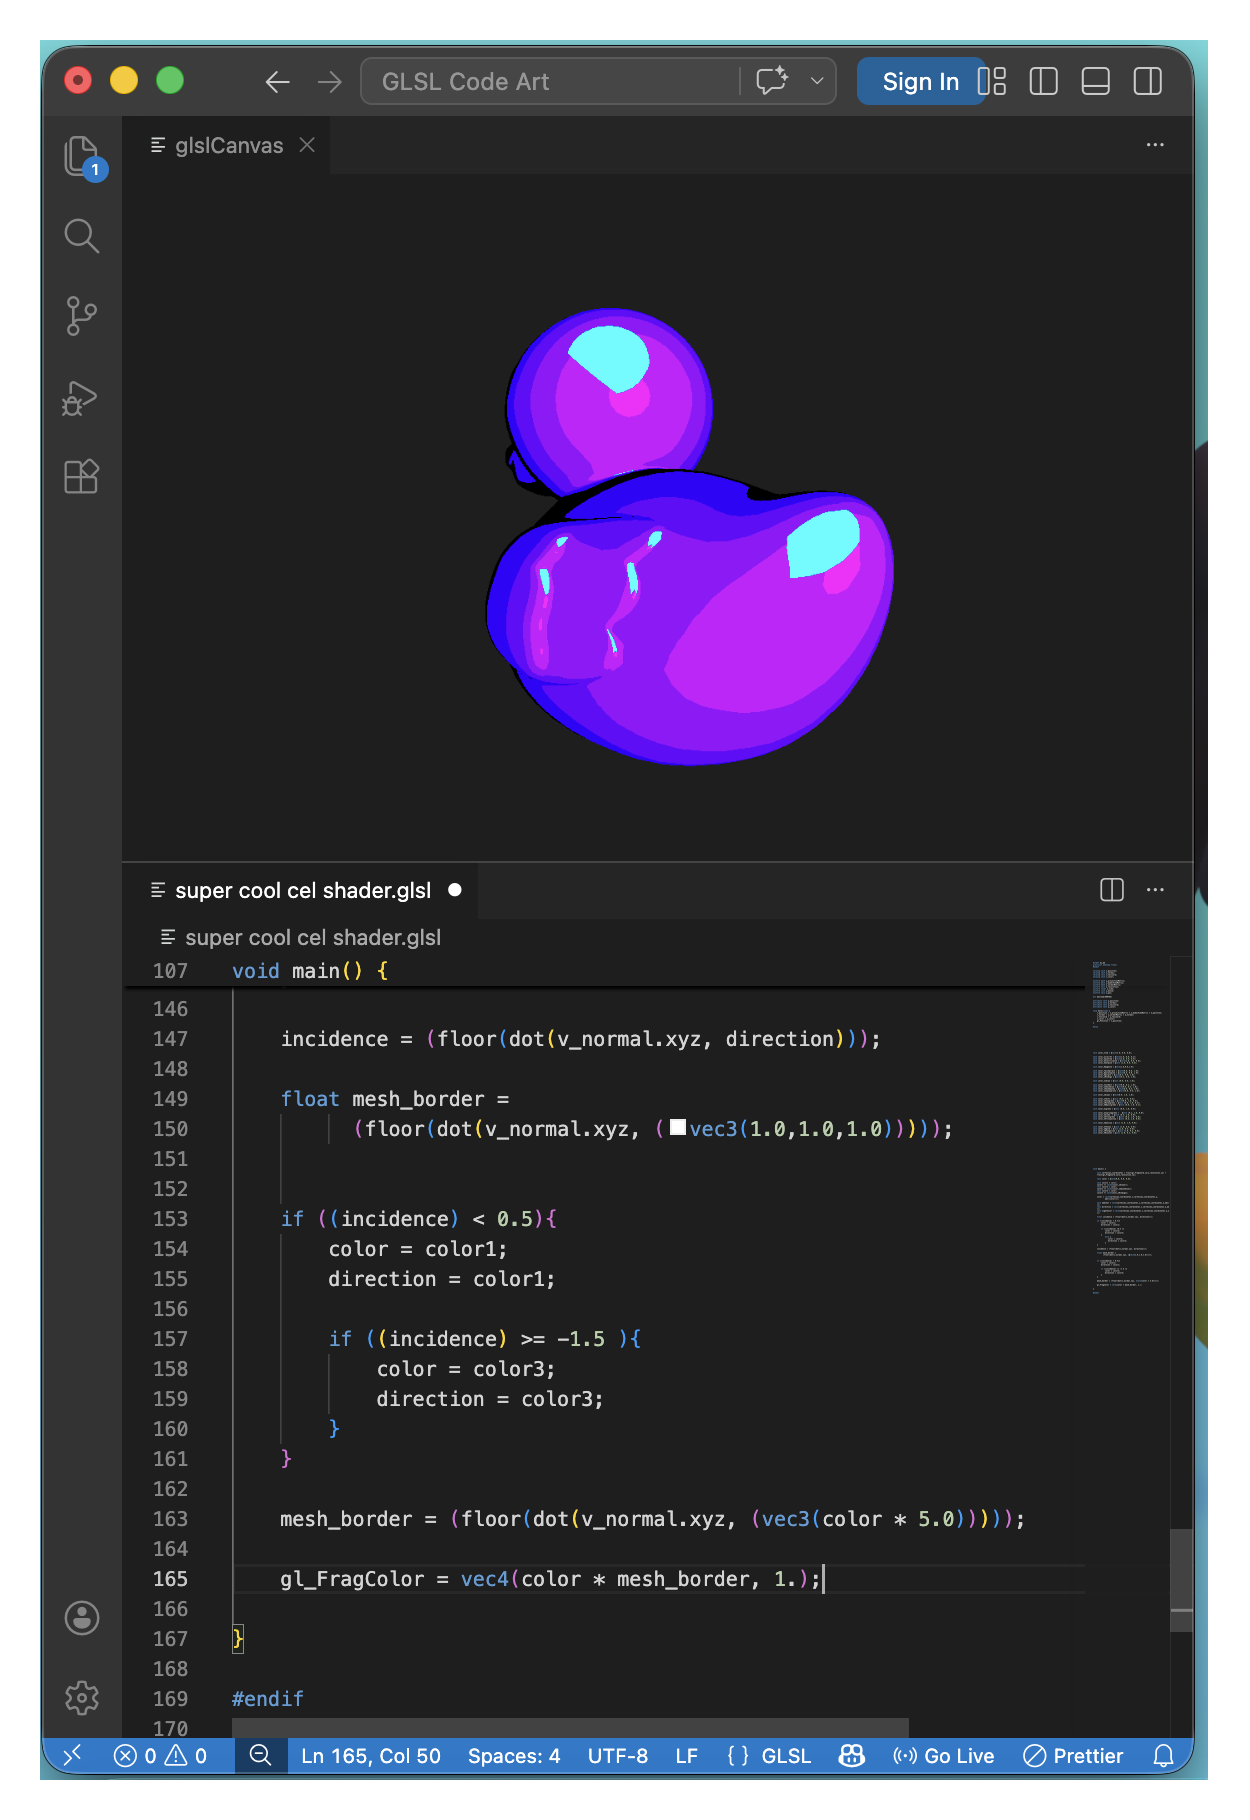
Your rubber duck should now look somewhat like this! :]
45.
46.
The last step is to recalculate mesh_border,
and crucially, intensify the saturation of the colours on display.
The 5.0 value can be played around with, try changing it to make the lighting brighter, or more subdued.
The extra mesh_border line of code, goes just before gl_FragColor.
this is the finish line of part two of this 3D GLSL shader tutorial.
hopefully you learnt even more cool code magic in this part two of my tutorial to build a cel shader with code!
if you found it useful, or if you have any feedback, if it was too difficult or too simple or if there's anything you want me to cover next time or any mistakes I've made, let me know:
(I recently realised I didn't leave any way to get in touch with feedback. I will set up an email or a social media page soon!)
I'm not 100% sure of my target audience yet,
but I think I want to mostly create content for people beginning or wanting to begin their indie game dev journey.
happy coding!
Logan :]
(part two of code tutorial updated: 14/07/26.)
...
(code tutorial last updated: 15/07/26.
- small updates to clarity of written text, mentioning more specifically where to put new lines of code when coding the cel shader.
...
...
...
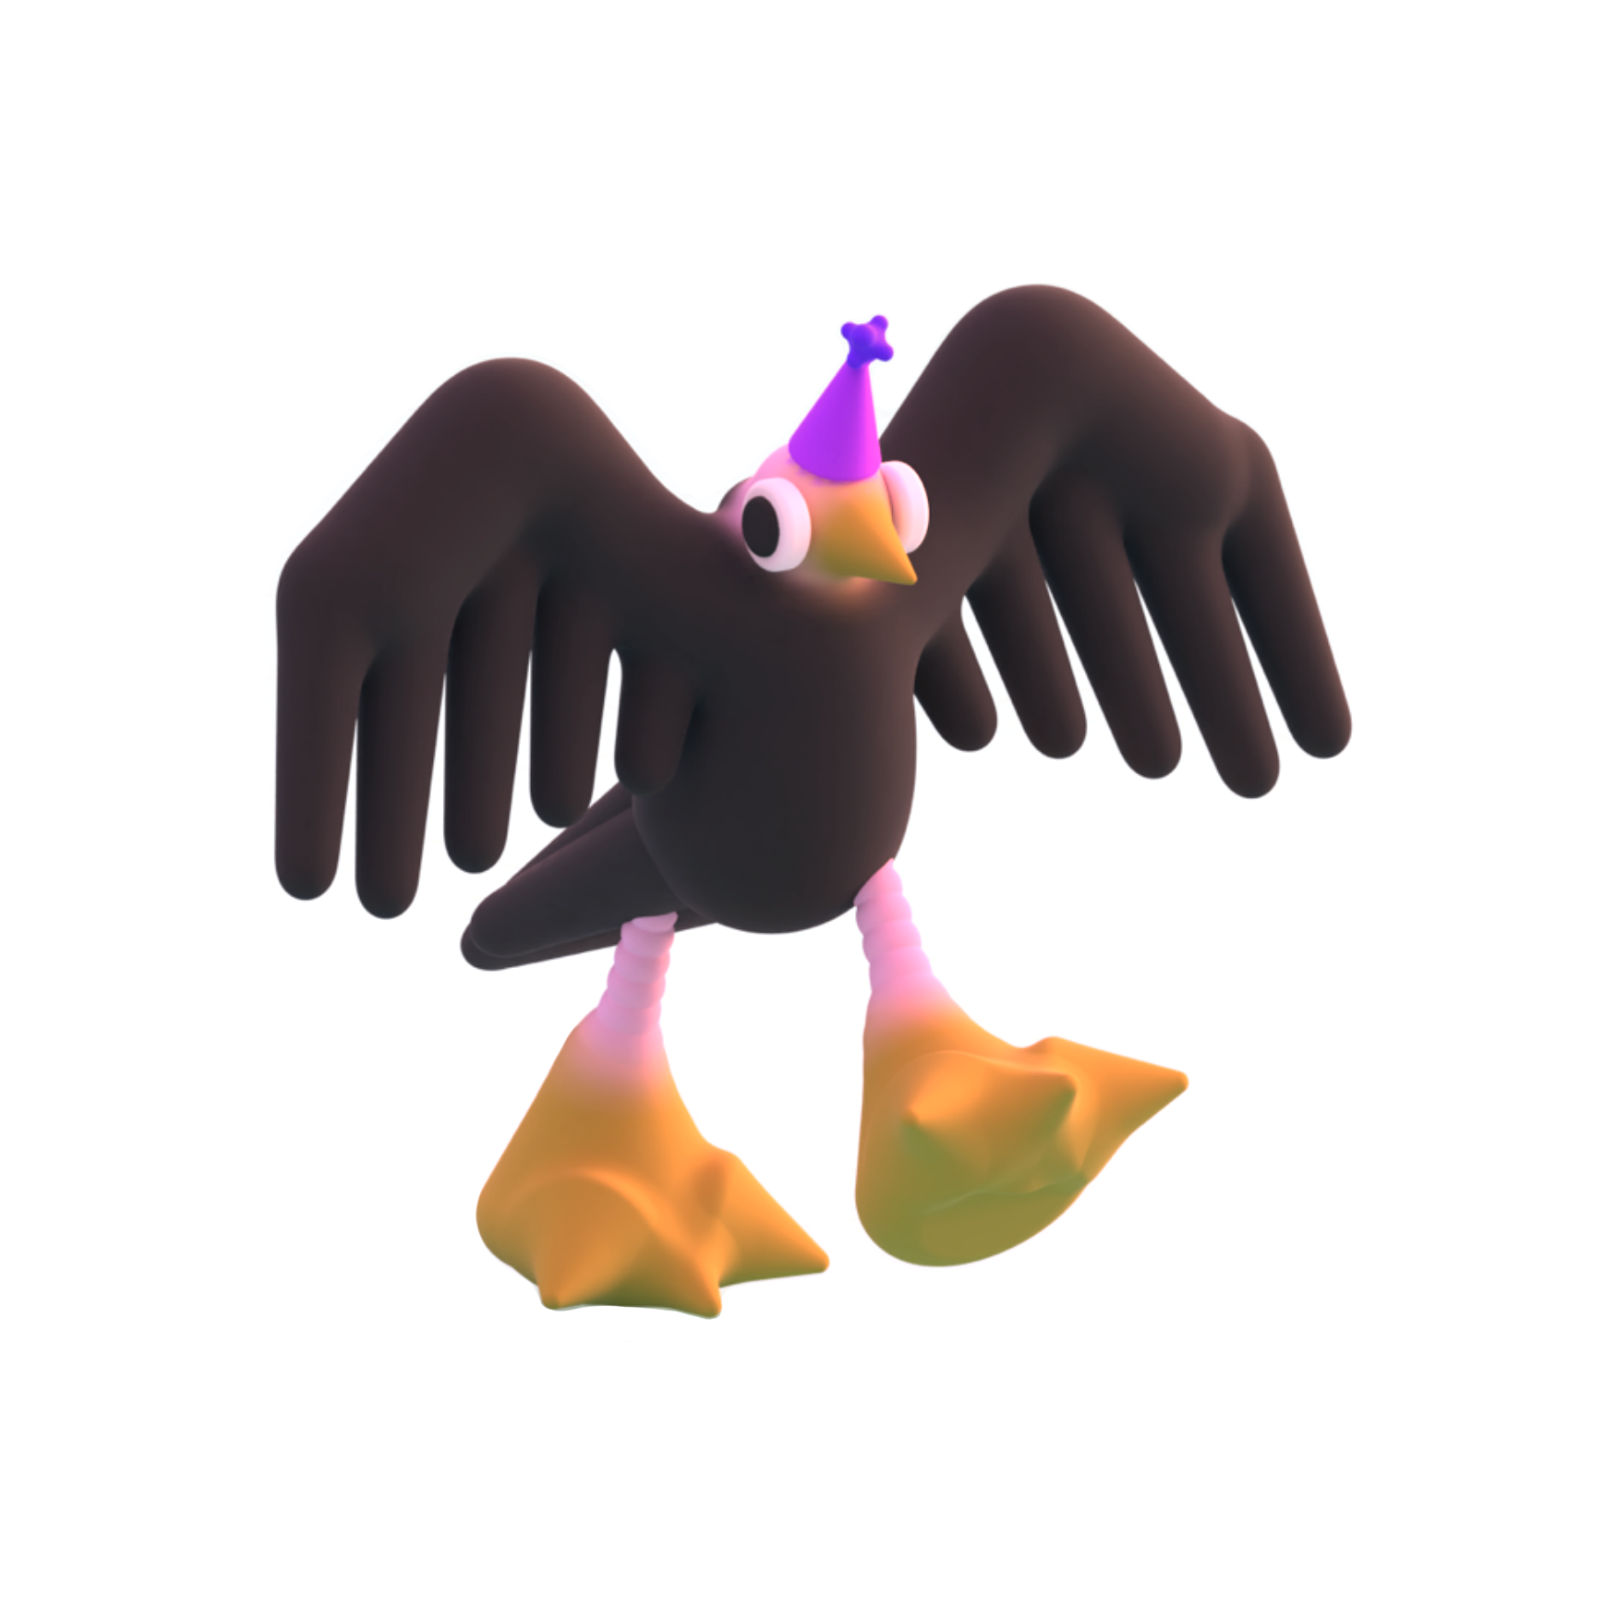
oh, and here is a bonus shader I created by playing around further since I last published the first part of this tutorial all the way back in April.
I could give away the code for this one, but it is important with GLSL to tread your own path, I think.
if you're hungry for more GLSL knowledge you must experiment!
only through a process of experimentation (and maybe mathematics, that works too) will you have lots of fun, make lots of things, learn lots of new techniques,
and realise why it's the best coding language to ever exist perhaps? :D
keep making art with mathematics, and I'll see you in the next tutorial. ^-^