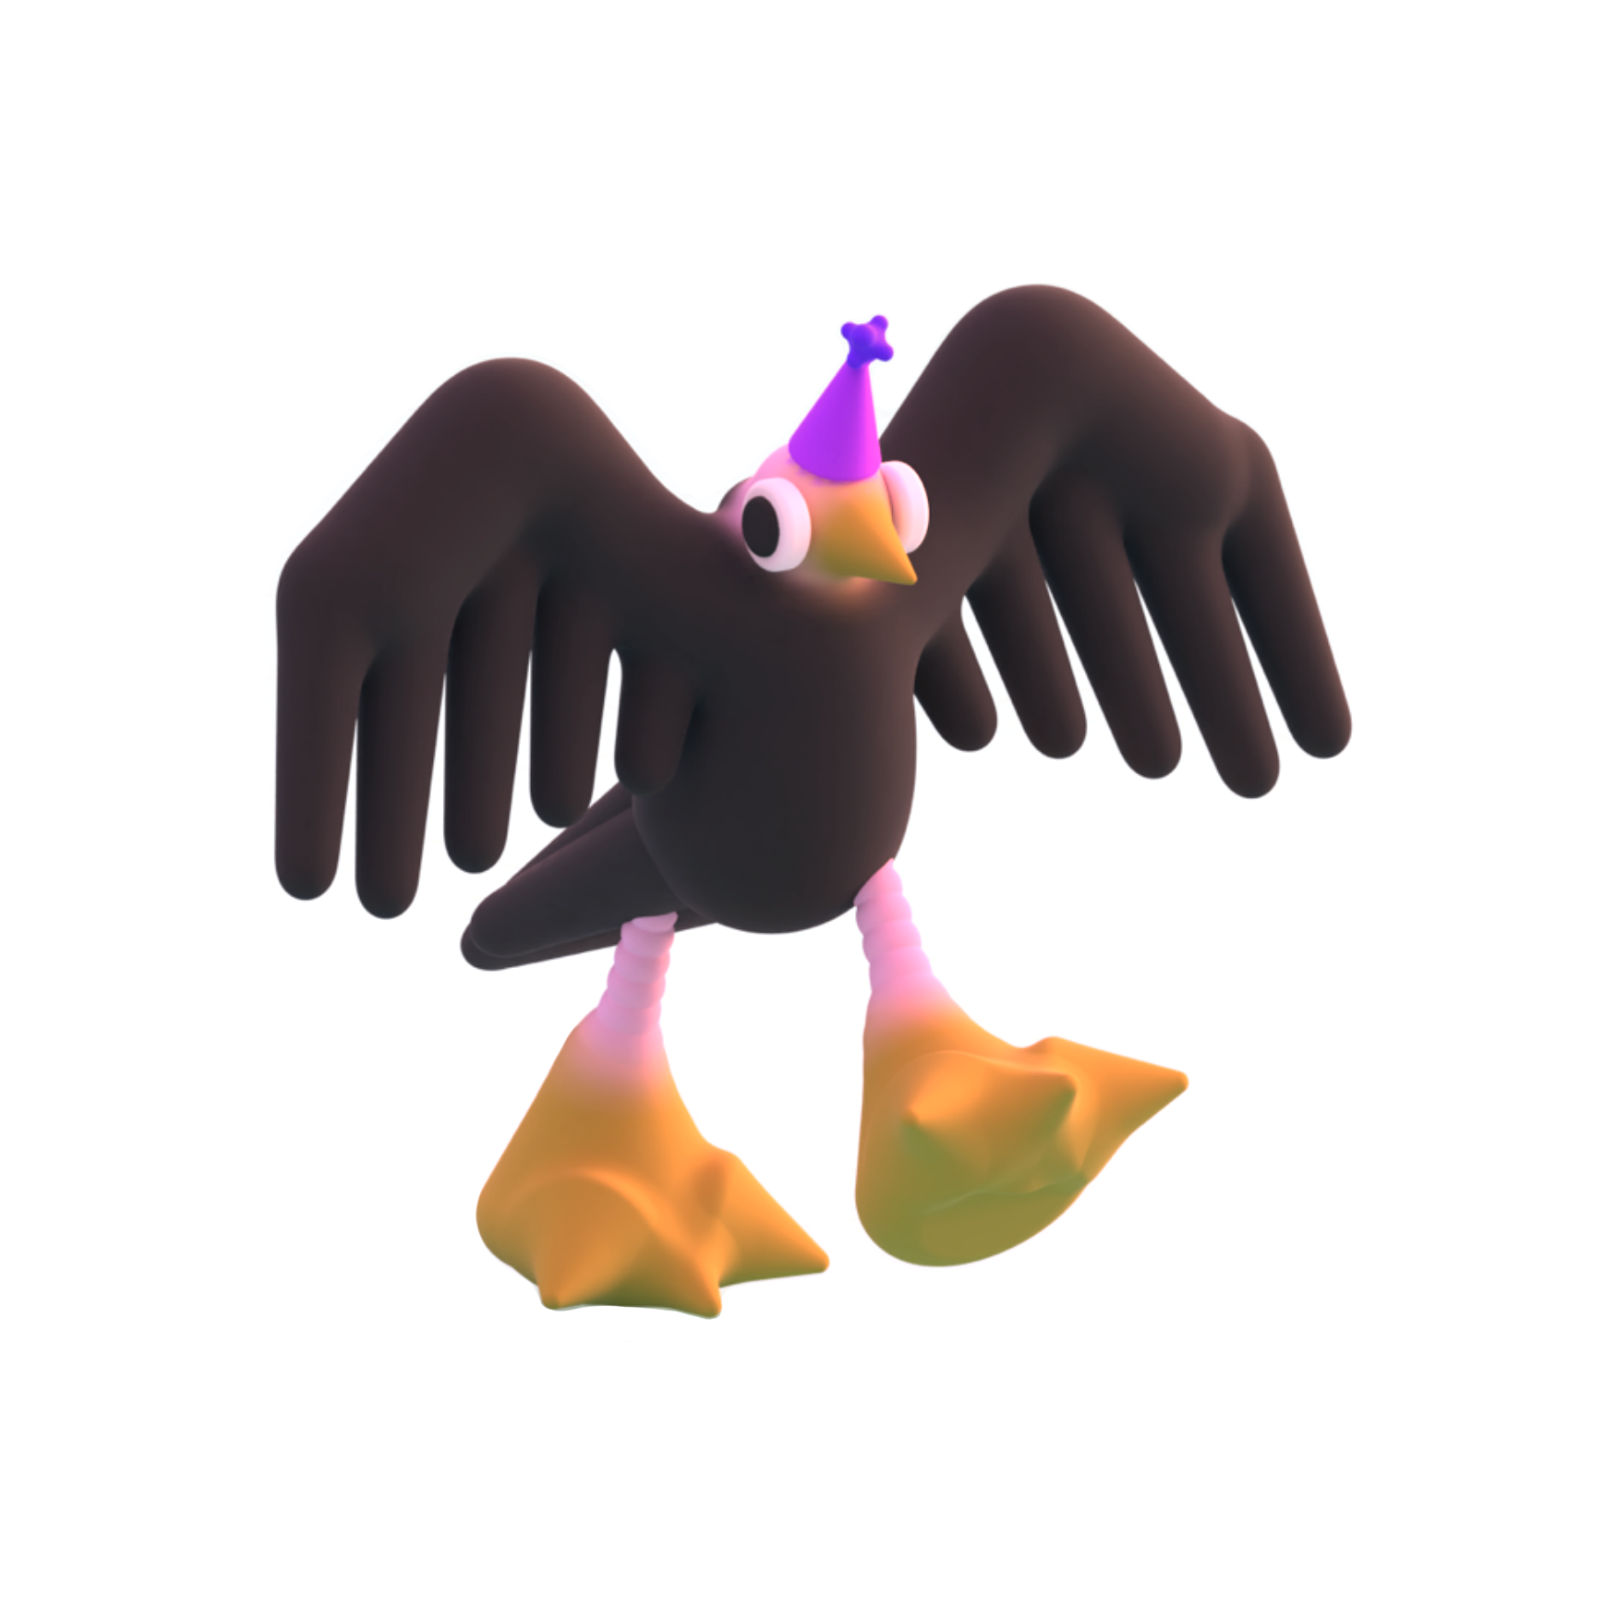
This is the first part of my first Indie Game Dev/VFX/Code Art tutorial!
Learn about how to code a 3D GLSL Cel Shader,
and what a 3D GLSL Cel Shader even is,
and why you might want to create one with code in the first place.
Start with Part 1, and then progress onto Part Two! :]
1.
hi, I wanted to make a tutorial and show the making of my first ever 3D
GLSL cel shader. I originally made a video tutorial on vimeo and it was terrible. :P so I'm remaking it as a proper written tutorial.
this is part one of the tutorial and I've split it into two parts total.
2.
- important note: 2D shaders can make the screen strobe really fast if your values go out of a numerical range.
you may not always know what that numerical range is if you're beginning,
because it depends on the specifics of the maths in each line of code.
the process of making a 3D cel shader, in my experience, is less likely to do this, but there is always some possibility you'll enter a value that causes intense strobing until you delete a bit of code or close the code editor window, and the strobing stops.)
please check in with yourself and the people around you to make sure they're not sensitive to flashing lights before playing around with GLSL in a code editor.
3.
you will need:
- a calm and comfortable space to concentrate on the tutorial, and an hour or so to spend on it if you're fairly new to coding.
- wi-fi or LAN internet.
- your computer (a Windows computer or an Apple Mac. Linux would also likely work, but if you're on Linux, you know more Linux than me.)
(if you don't have a computer, and are on a phone or a tablet, I'll try to make a tutorial at some point to explore 2D shaders,
which can be run in a browser. there are a lot of great 2D shader tutorials out there.
I really like The Book of Shaders, tutorial webpage, made by Patricio Gonzales Vivo and Jen Lowe. it's incomplete, but it was my first introduction to coding anything, and is still a wonderful resource.
if you've never coded anything before, it's a really good place to start coding fun 2D fragment shaders, if you happen to be looking through this tutorial and thinking it looks a bit too complex.
you can find it here: thebookofshaders.com )
- the free Visual Studio Code editor program made by Microsoft. I use the downloadable version.
(a code editor is a place to type and run your code.)
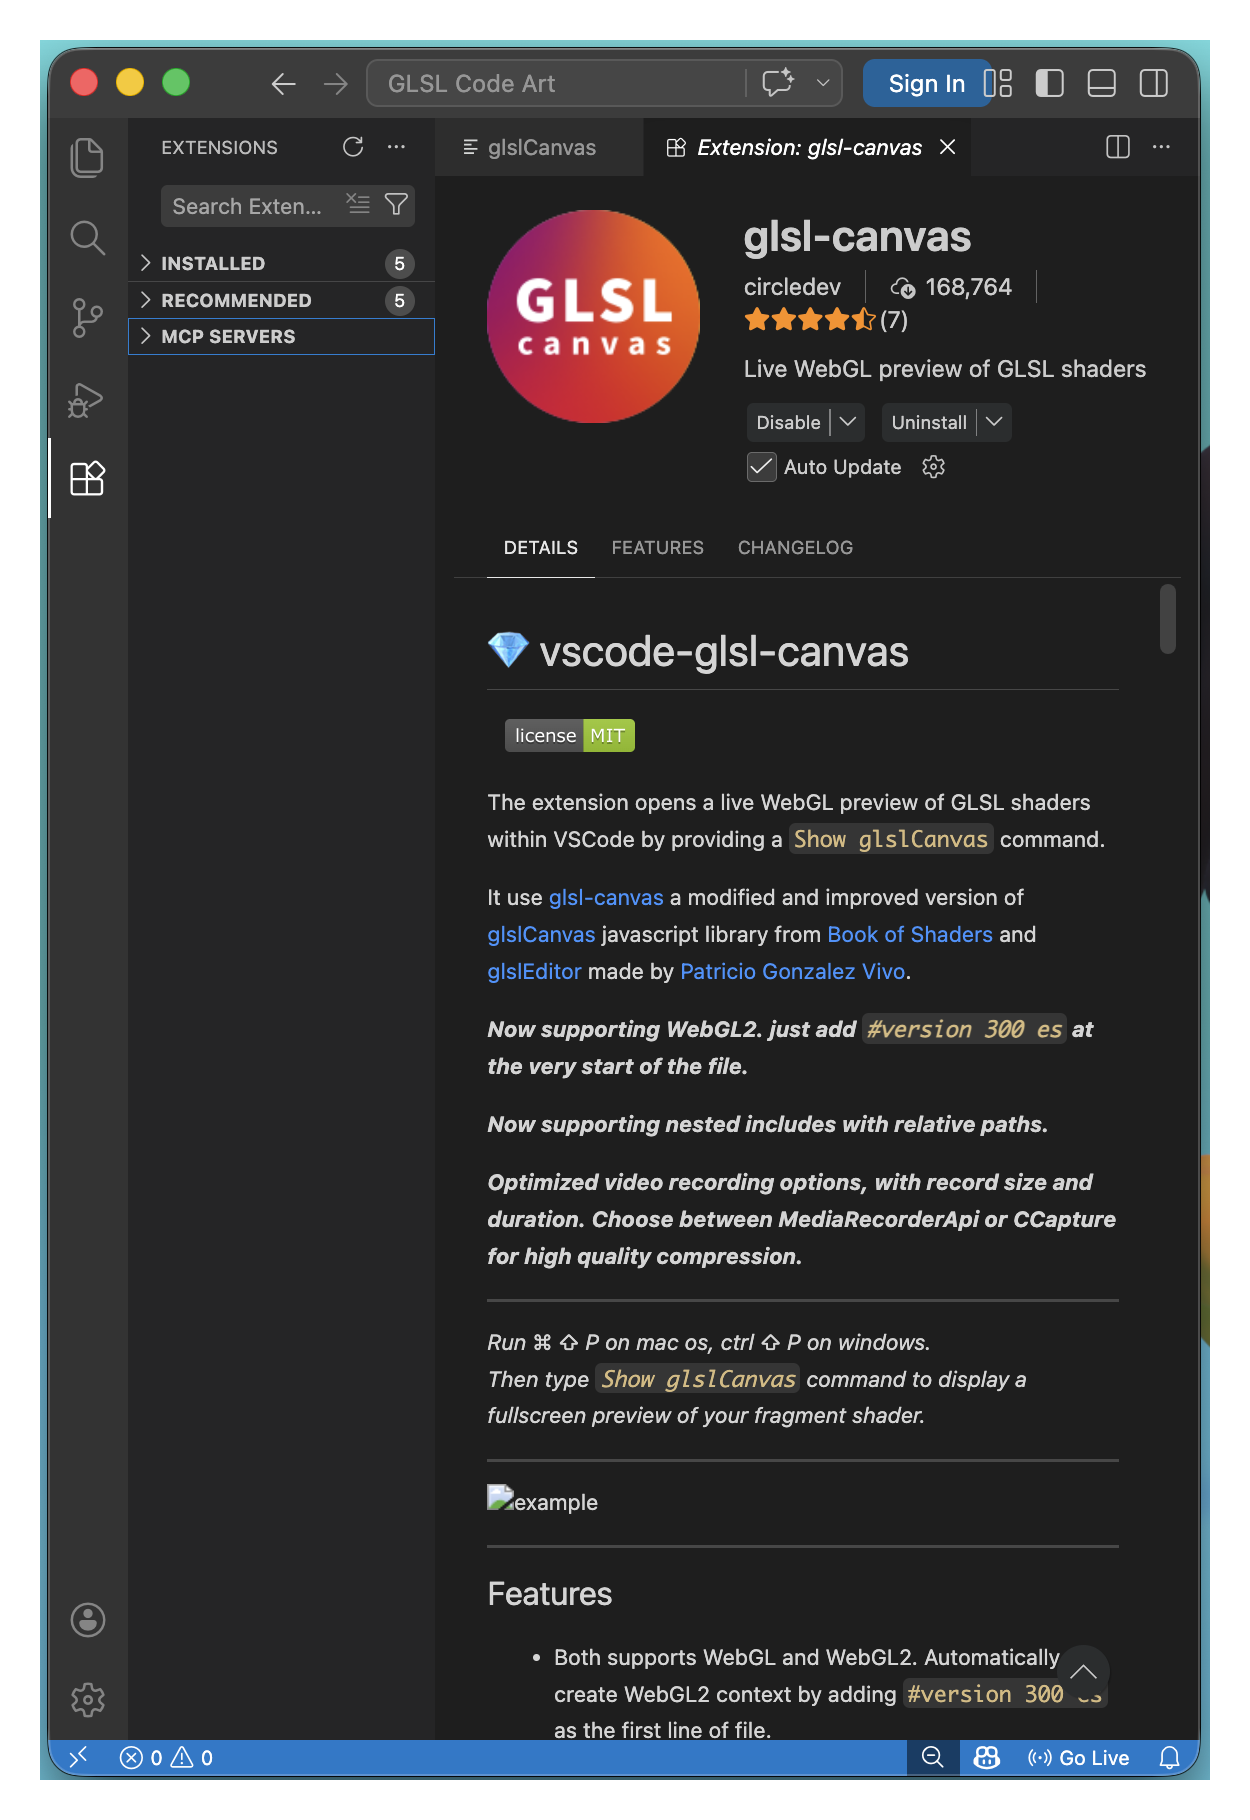
- and also along the way there is the Visual Studio Code extension glsl-canvas made by circledev to download to your Visual Studio Code editor.
(this allows you to see your GLSL code visually in the editor.)
4.
5.
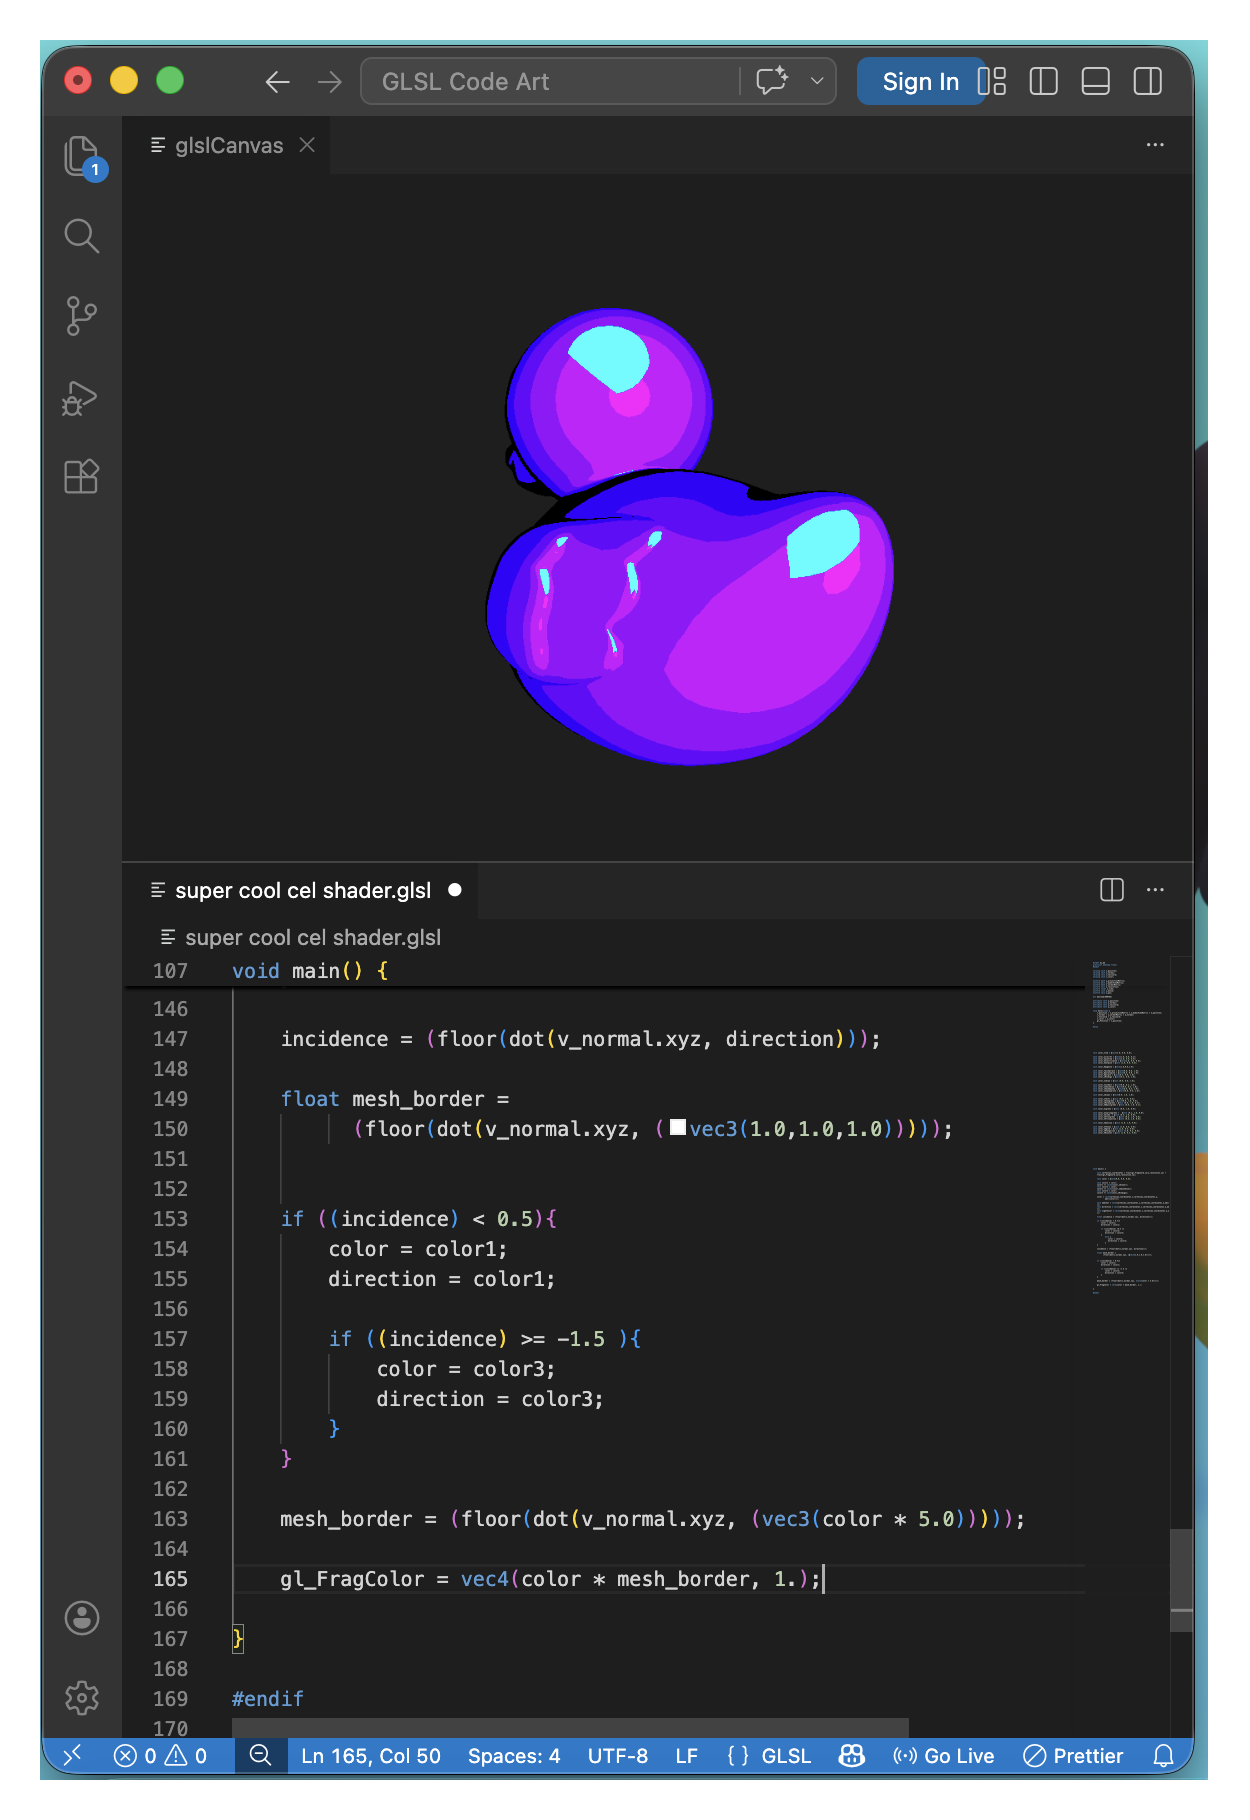
the basic concept of a cel or toon shader is; you get a 3D sculpture or scene,
and you can apply colour, apply texture, apply a response to lighting, all those sort of things,
to make the 3D model look like a 2D cartoon with bold linework and flat colours.
the most popular use of cel shading is in the game series Borderlands. MIO: Memories In Orbit (my favourite indie game at the moment, gonna review it soon) uses cel shaders also,
and I'm pretty sure the animated Spiderverse movies with Miles Morales use cel shading too.
6.
cel shaders tend to use flat colours mostly, but this one that I created looks slightly glossy and gooey.
which I think, I like. I figured it sort of realises my vision I guess, for what I wanted to make.
7.
so yes, let's get into it! :]
8.
I always found the idea of 3D shaders super exciting, but also difficult in approachability,
because every tutorial I'd found made it feel like such an expert level thing, and I wanted to make this tutorial, to be like,
I can do it, and you can probably do it too.
I think this is the core at the heart of all my code or art or writing tutorials going forward:
these daunting things are possible when you either experiment enough or find a tutorial that clicks with your individual thought and idea processes.
9.
first, I'll code the start and end of the 2D fragment shader. this will display a colour visible on the rubber duck. but it won't look 3D yet, there won't be any sense of depth.
10.
second, I'll start by exploring a basic 3D renderer.
this is where a lot of the real world approximating lighting physics are computed, so that a full 2D fragment shader (that we'll code later in the same text file), will wrap around the mesh and look like there is a real 3D object on the screen).
11.
and then finally,
fill in the middle with the second half of the lighting physics effects as we progress, to make the cel shader look like a cel shader.
12.
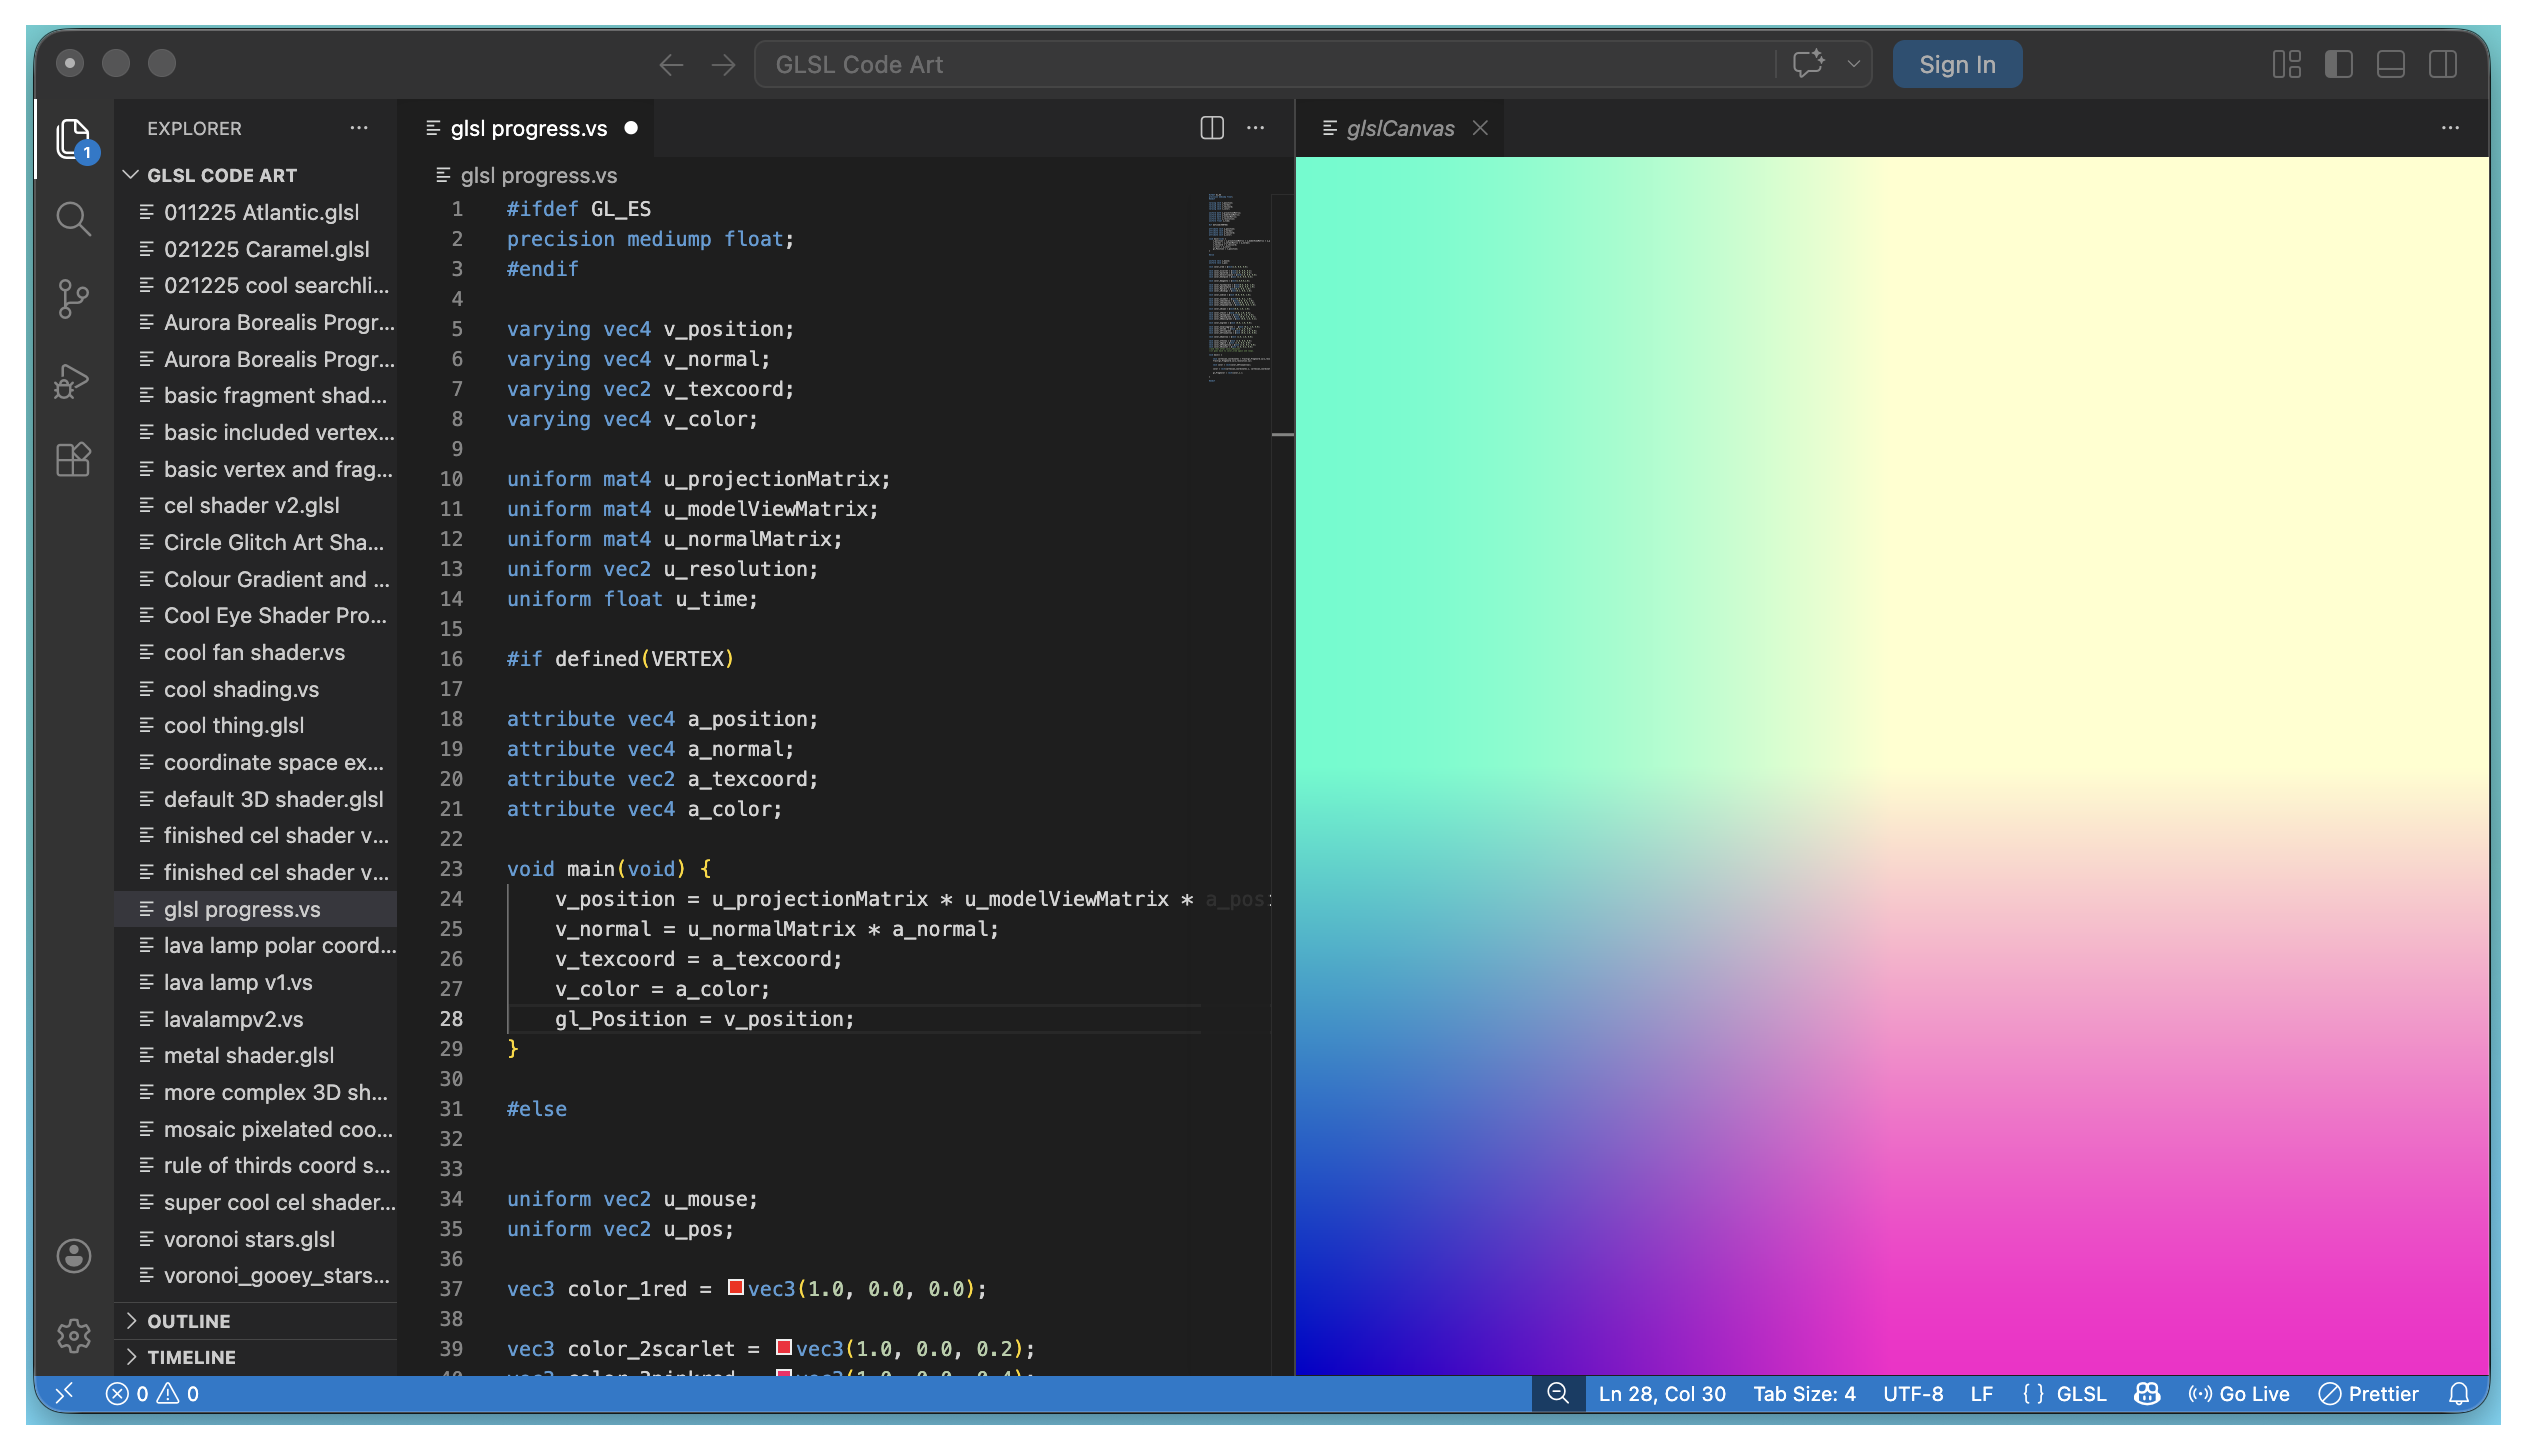
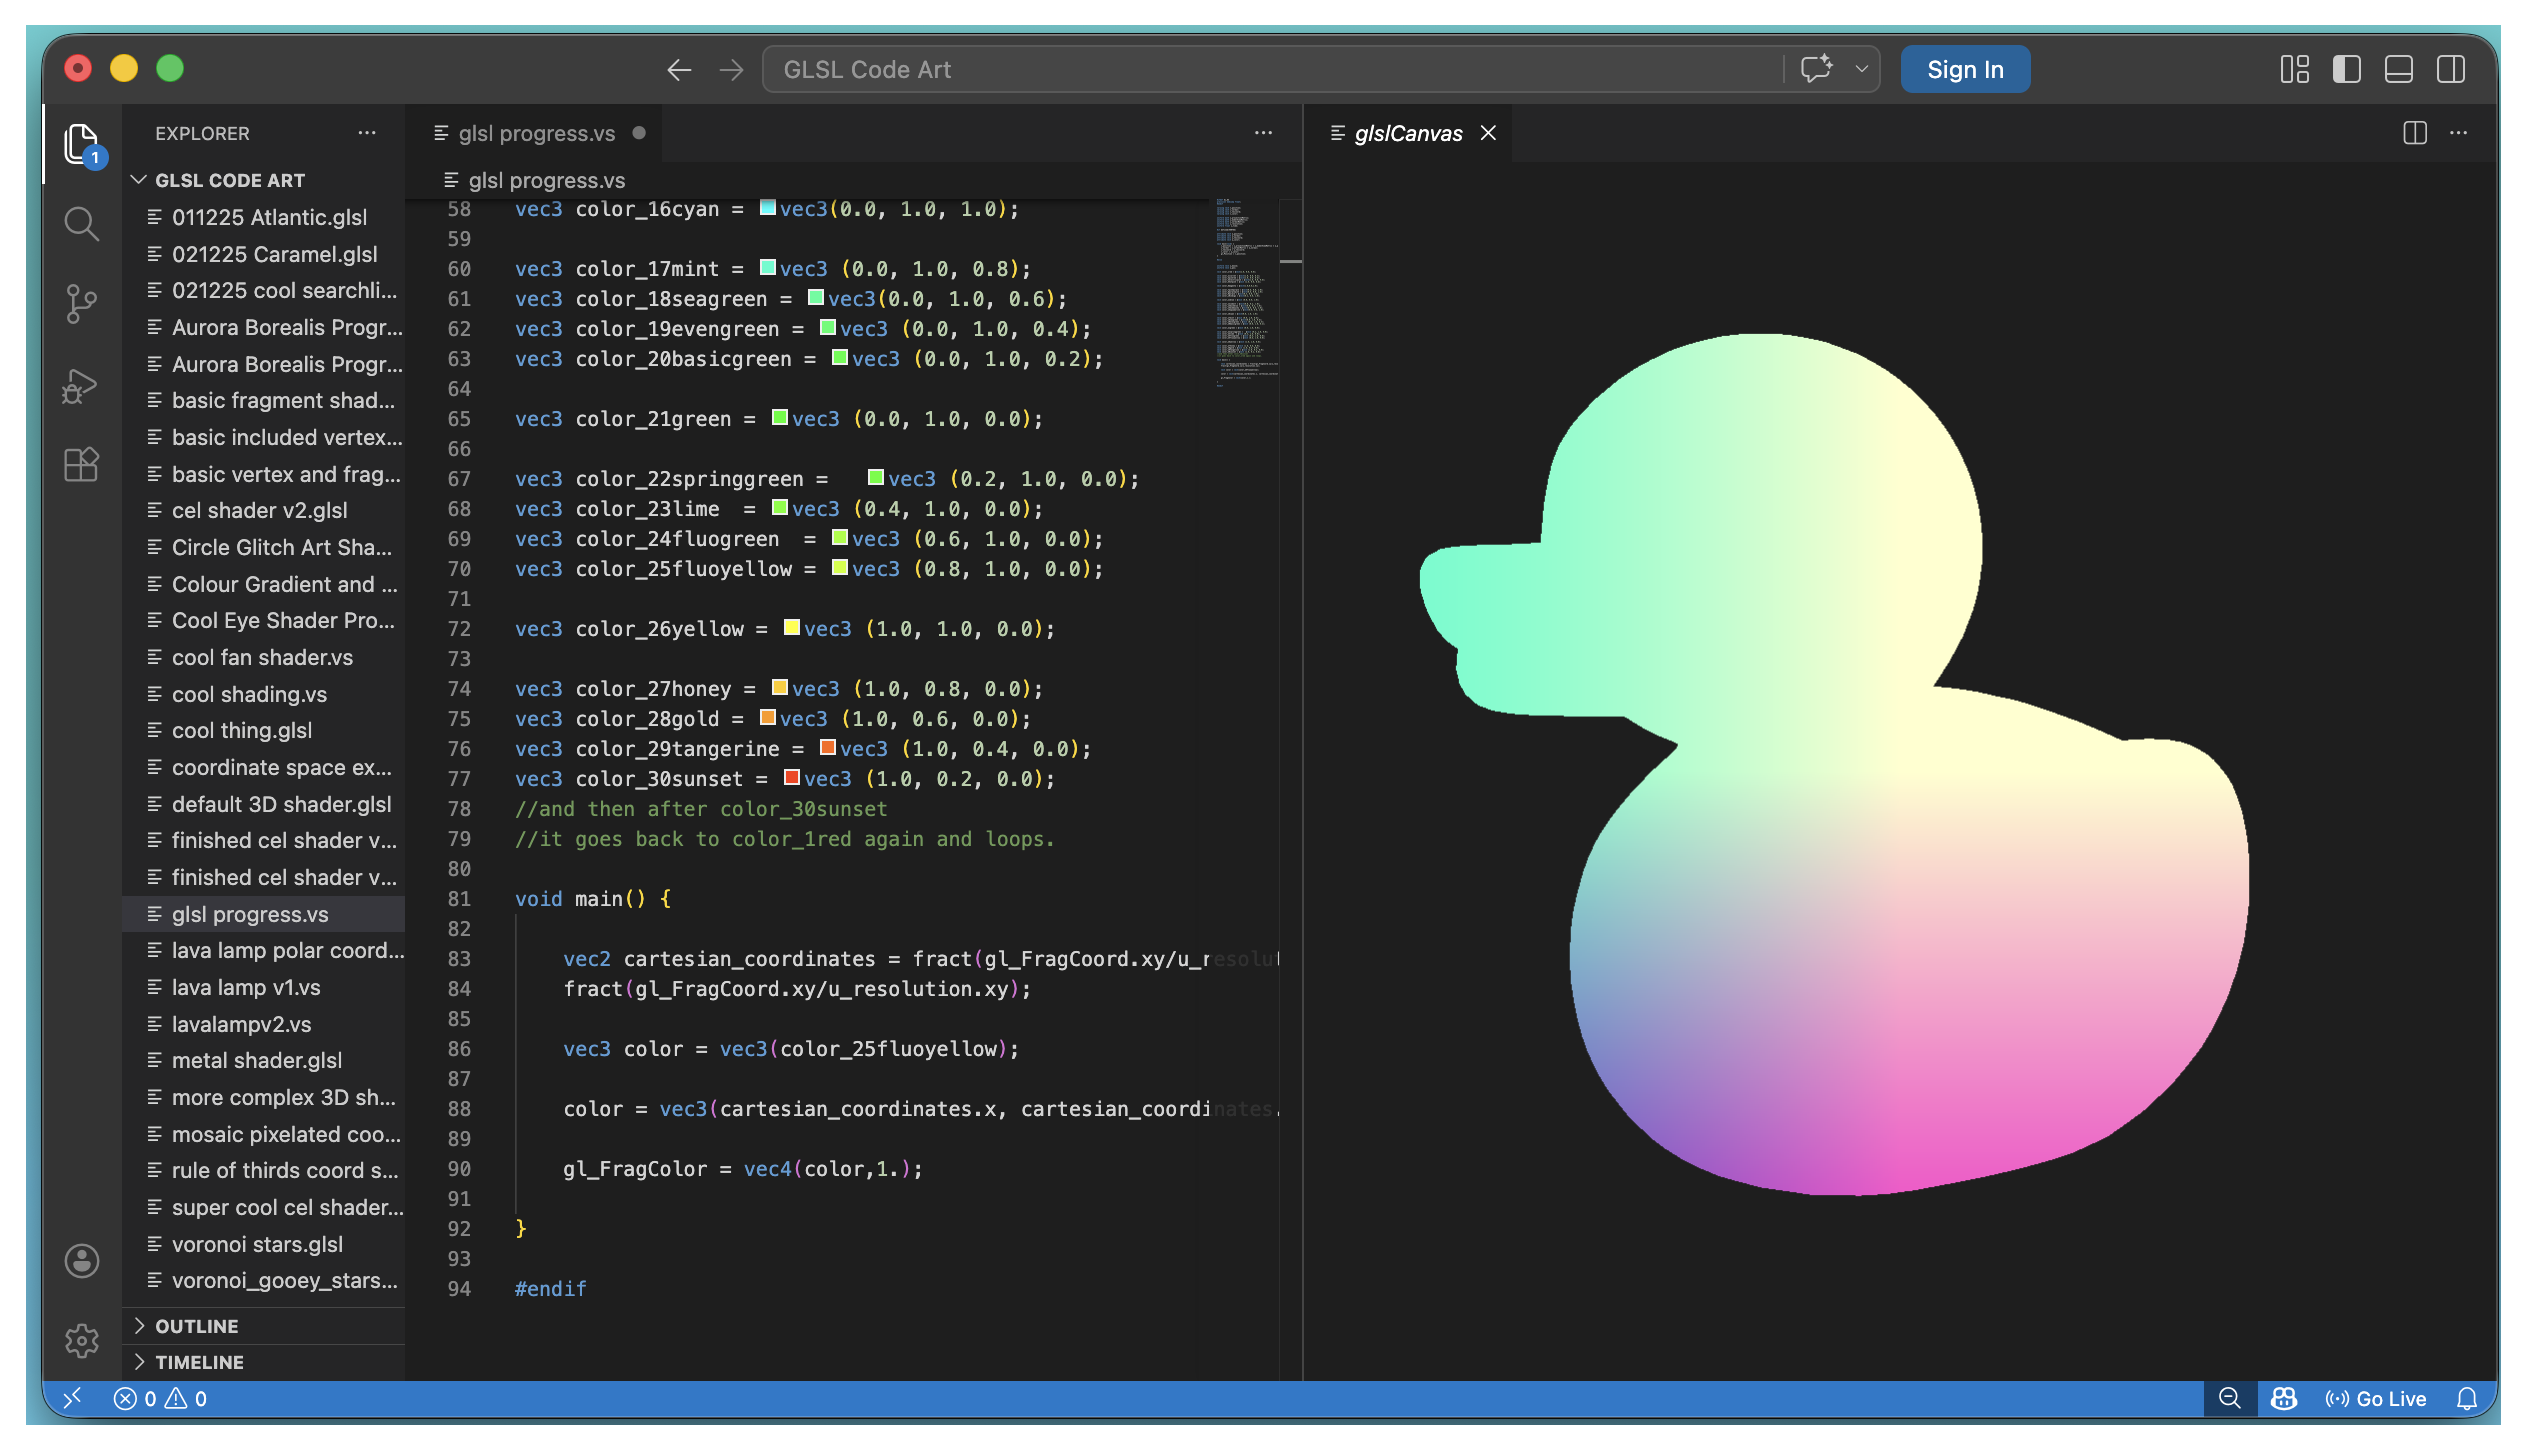
but at the very start, before that, we have to open up Visual Studio Code and configure the space we're working in.
13.
to run GLSL code, you need to have:
1. a place to type your code, so a text file.
2. a place to see your code (the glslCanvas extension).
let's set these up now.
14.
you're going to want to go to file and open up a new text file and name it whatever you'd like to call it
and then at the end of the file name, you're going to put a full stop and then the file format glsl, so your file name will look something like this:
myfirst3Dshader.glsl or here's_a_cool_cel_shader.glsl
15.
next up is the extension that will allow us to see the art the code actually makes.
you're going to notice that after opening up a text file in Visual Studio Code, there will be five small icons on the left side of your screen.
an icon of some papers, a search bar icon, an icon of some dots/nodes joined together, an icon of a play button with a little bug on it, and an icon that looks like four blocks.
the last one is the one you want to click on. a search bar should appear, and you should be able to search for:
glsl-canvas
16.
make sure it's the one by circle-dev with over 150,000 downloads, and when it's installed,
you can go back to your text file window
and open up a glsl-canvas window within Visual Code.
by pressing ctrl shift and P on your Windows keyboard
and then selecting Show glslCanvas.
or,
command, shift and P on your Mac keyboard,
and then selecting Show glslCanvas.
17.
18.
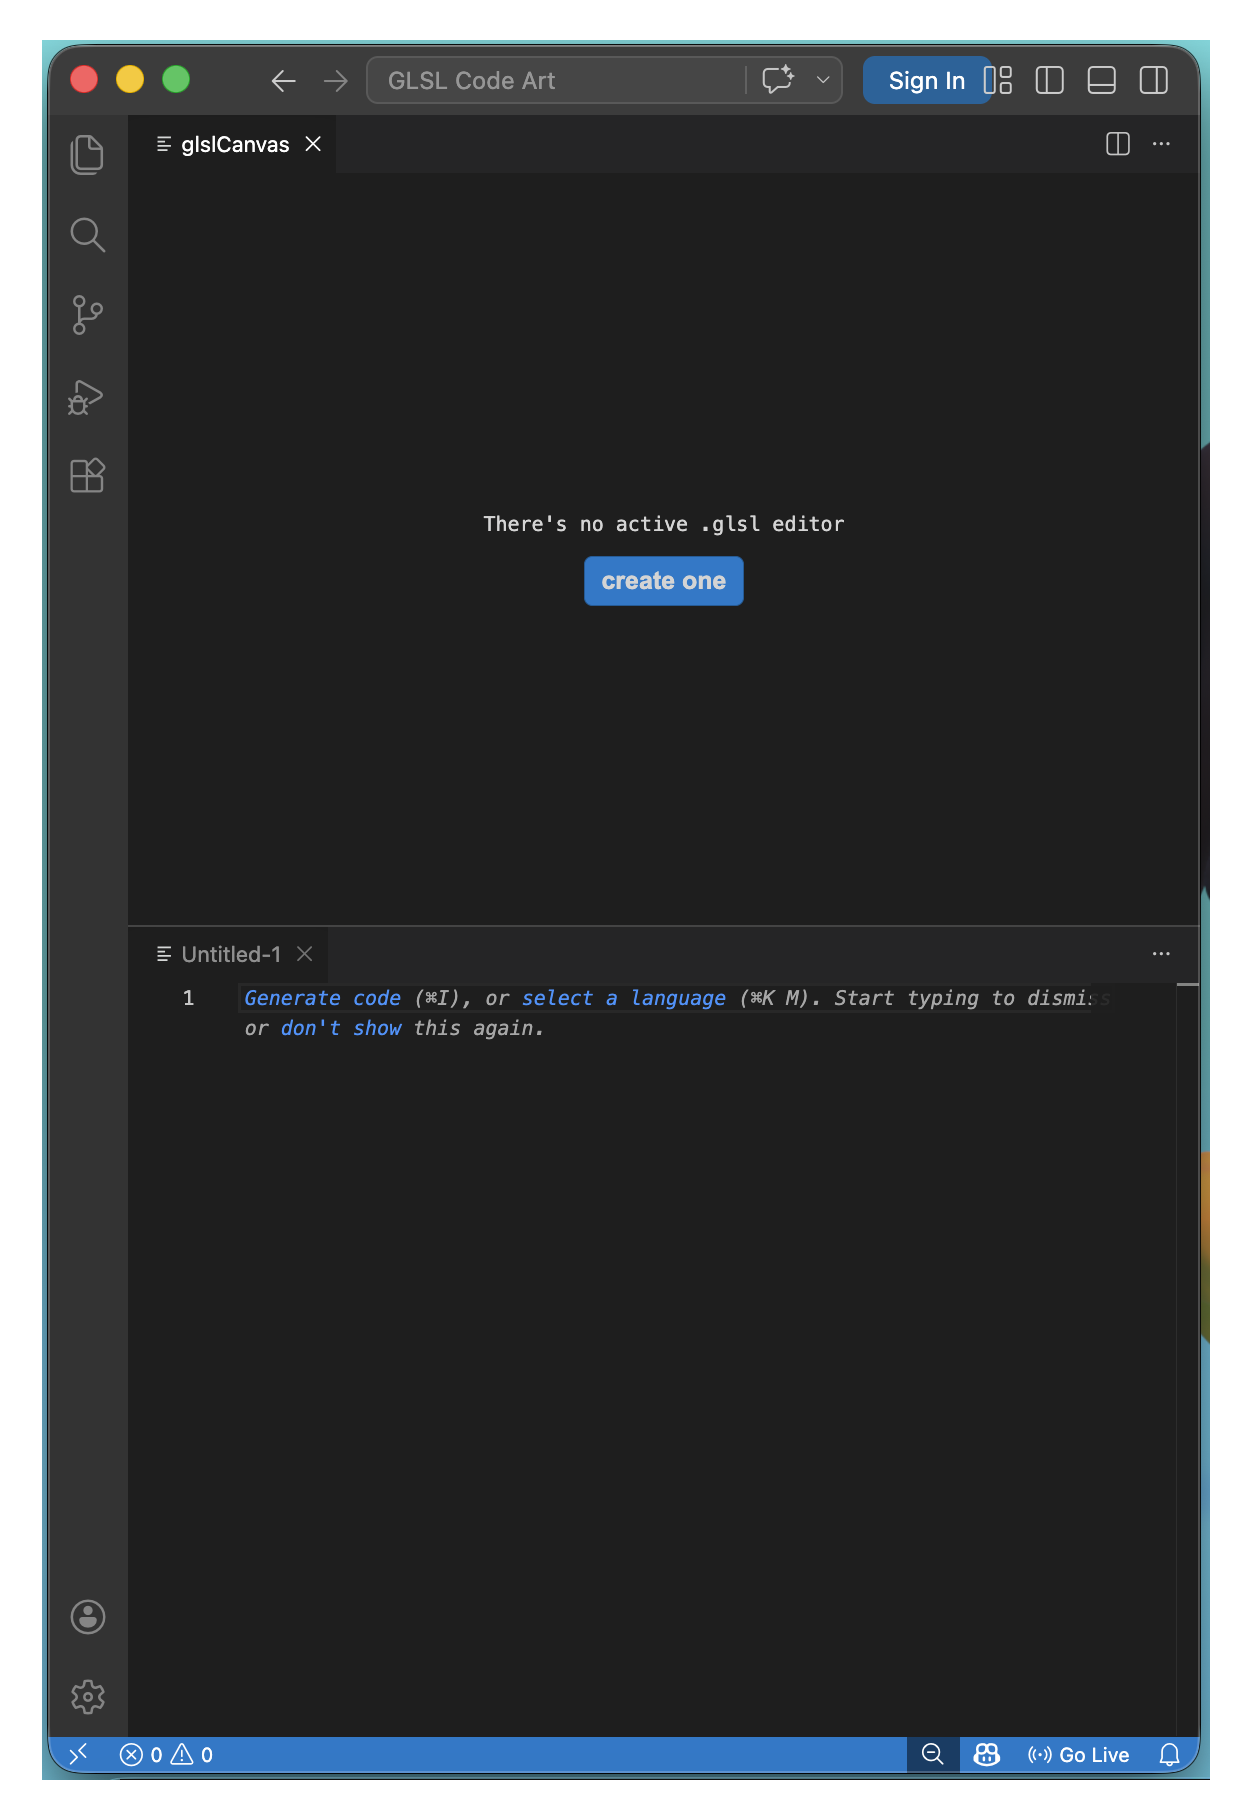
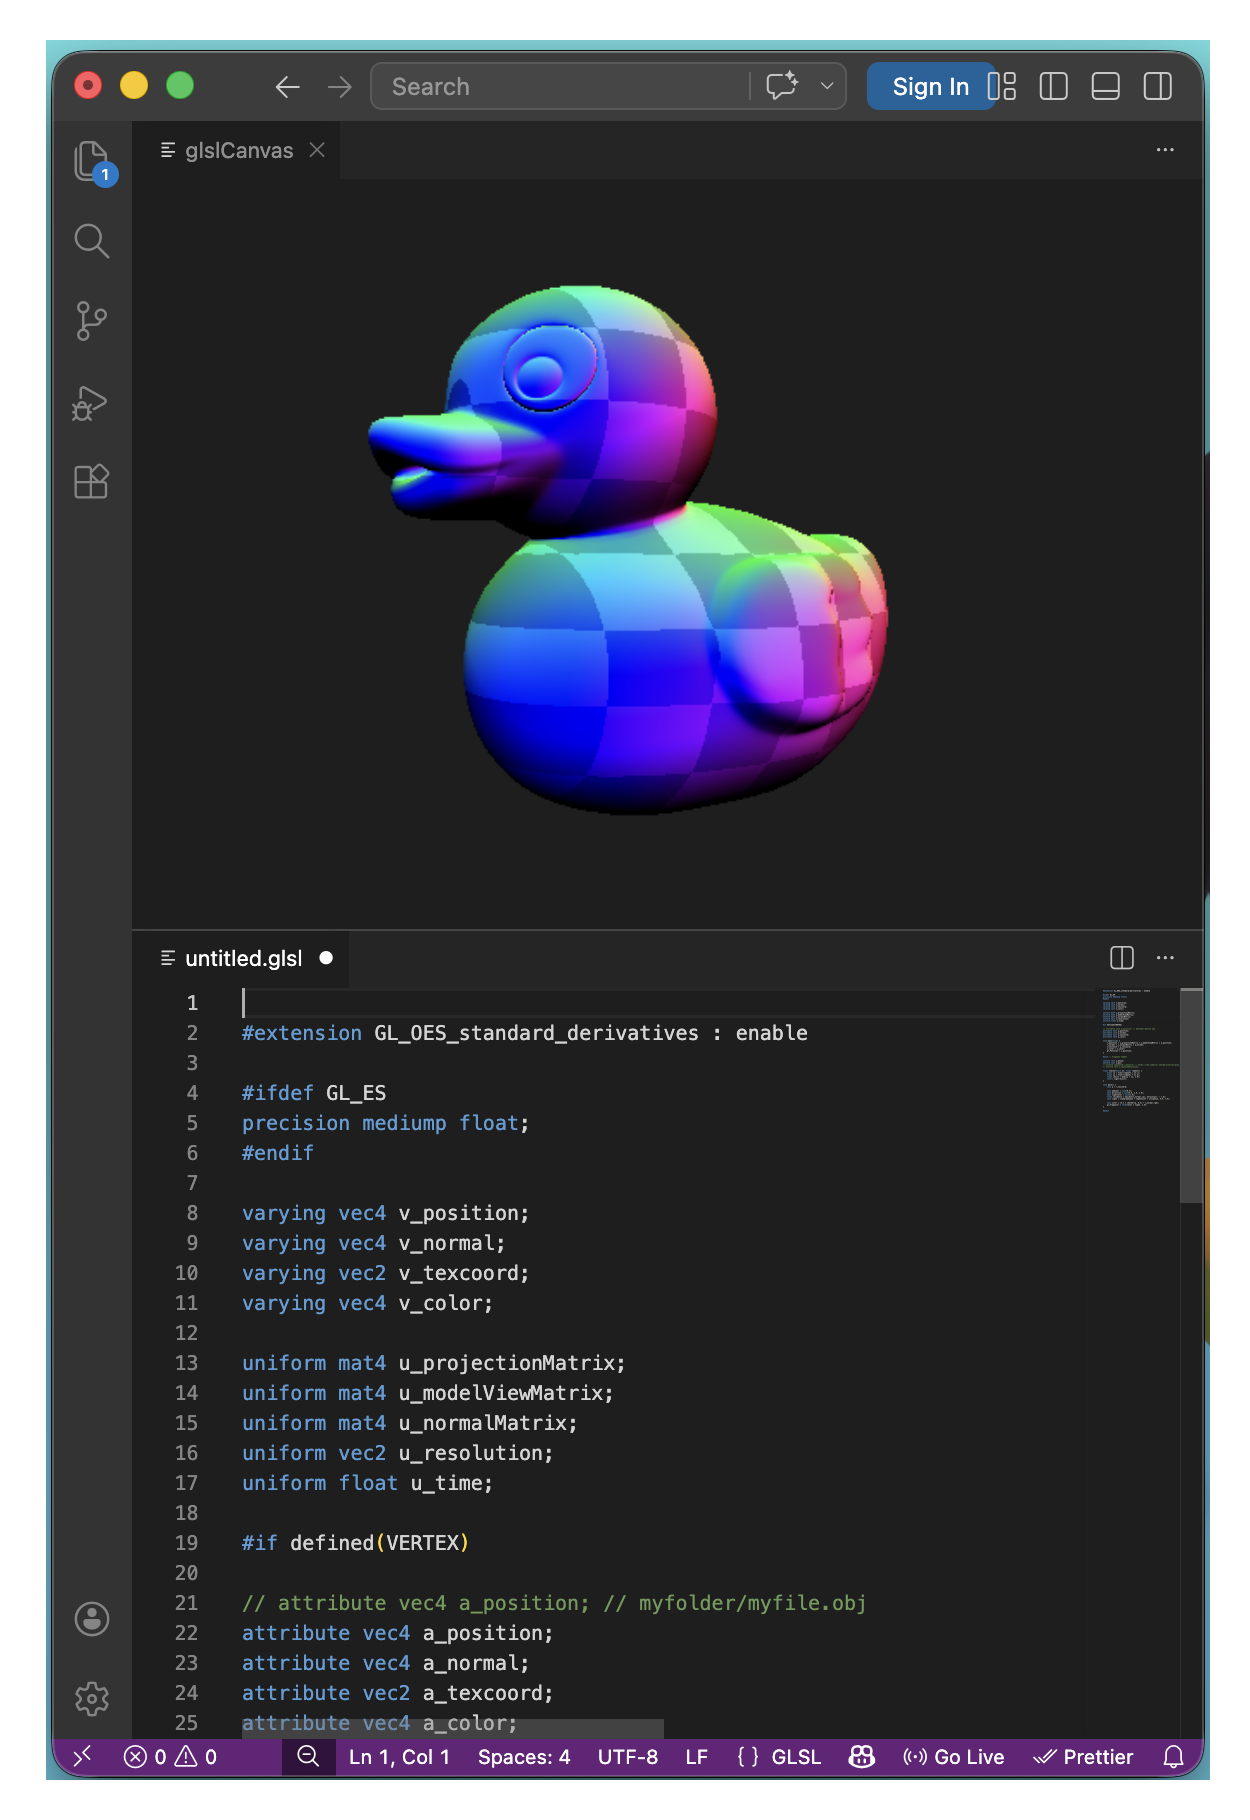
now, you should have a window that looks somewhat like this.
19.
20.
click on the button located under the text that reads, There's no active .glsl editor. a blue checkerboard pattern should appear in the glslCanvas window, and some lines of code in your text file.
you can then mouse over the blue checkerboard pattern and a user interface should pop up near the bottom of it.
you're going to want to find the shapes, and change the default flat square plane, by clicking the rubber duck shape.
21.
you should now have a rotating 3D duck on screen that has a rainbow checkerboard pattern. the code is what is known as a GLSL 3D vertex shader, and it's a great foundation upon which you can play and experiment with.
this glsl vertex shader is the mathematical base for pretty much any 3D game / 3D animation / 3D movie visual fx process. the shader itself can be applied to different 3D sculptures and scenes to make them look substantially cooler.
22.
23.
so, of course, we're now going to delete half the code ( :P ), and then learn about how it works in a simpler form, by making a cel shader, which is a lot more cartoon-y and mathematically a bit different to what we currently have in the code.
24.
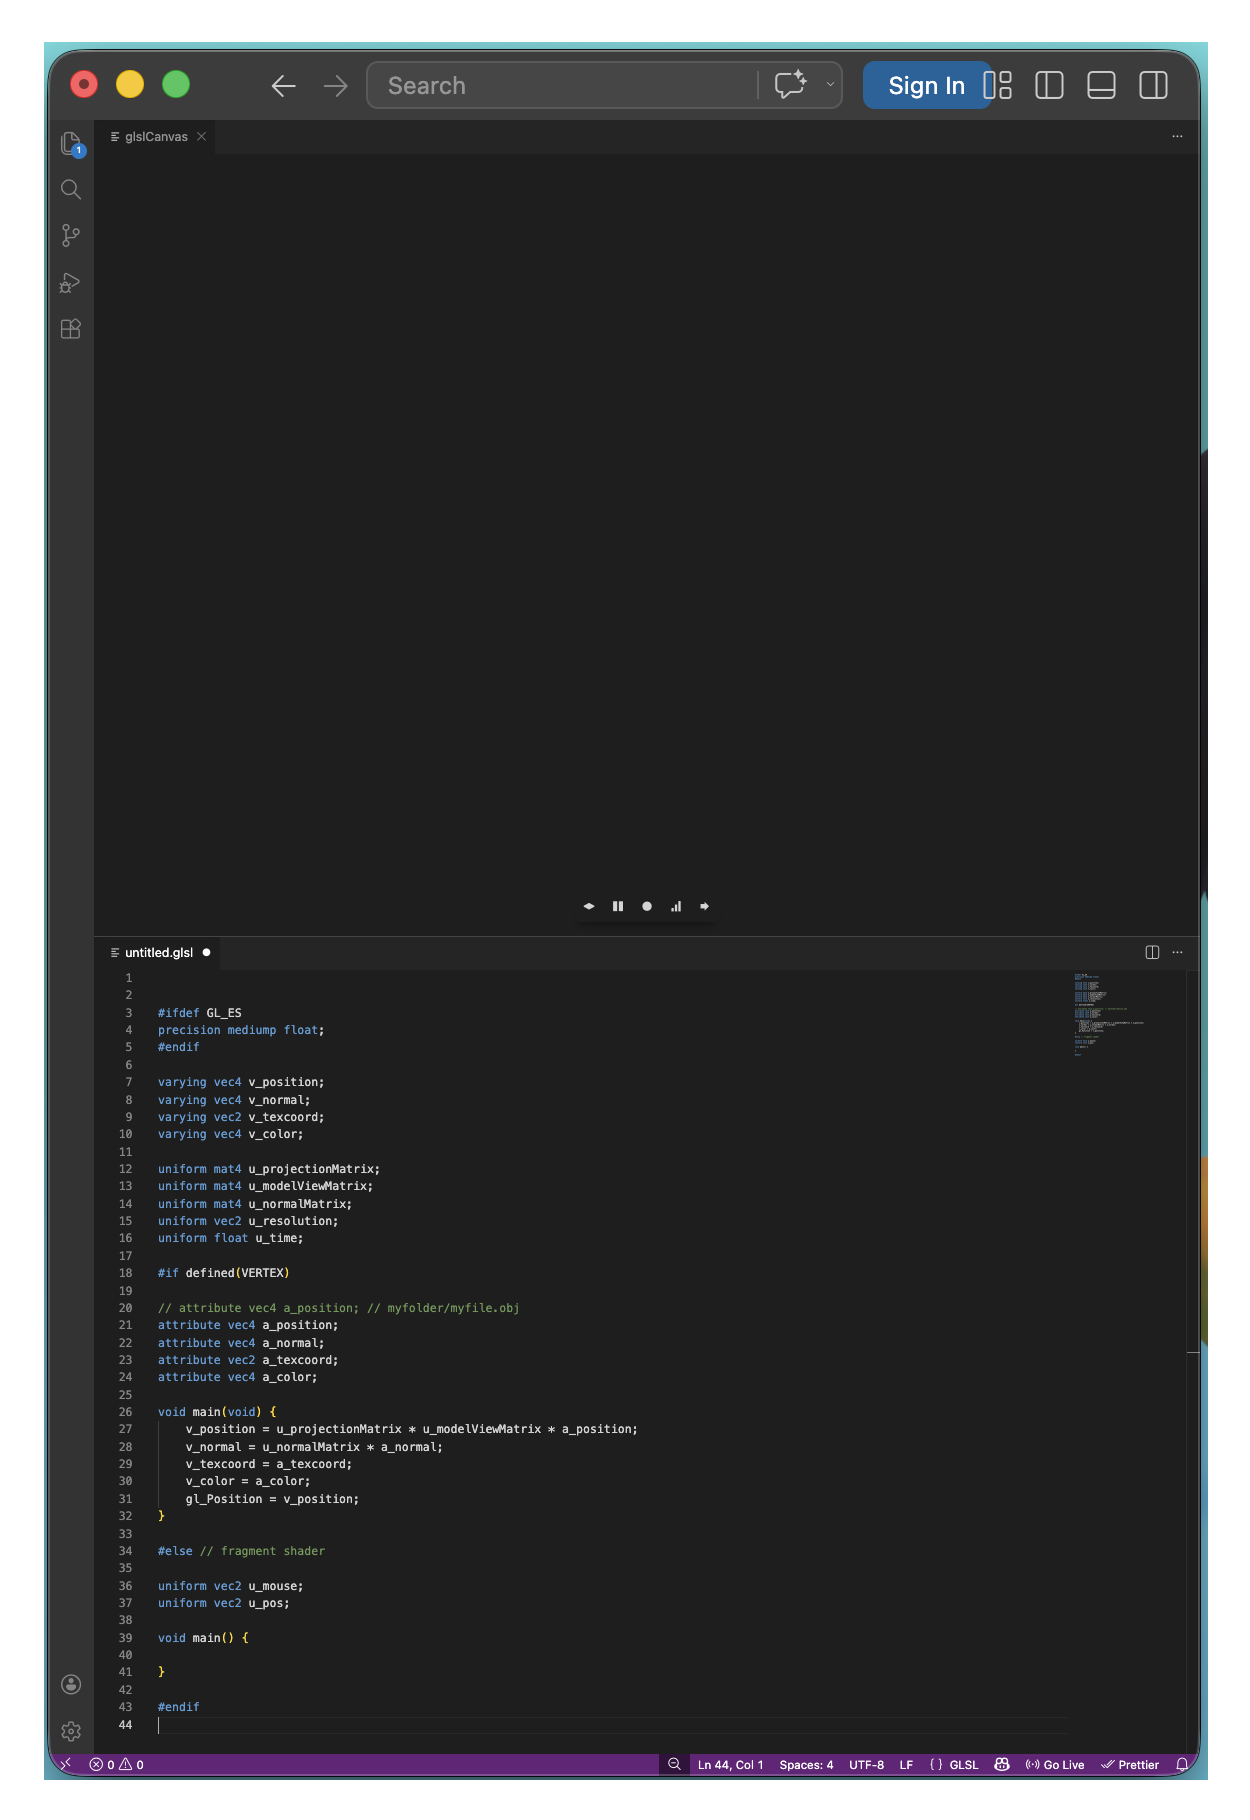
what we want is to backspace/delete anything that isn't these following lines of code:
25.
#ifdef GL_ES
precision mediump float;
#endif

varying vec4 v_position;
varying vec4 v_normal;
varying vec2 v_texcoord;
varying vec4 v_color;

uniform mat4 u_projectionMatrix;
uniform mat4 u_modelViewMatrix;
uniform mat4 u_normalMatrix;
uniform vec2 u_resolution;
uniform float u_time;

#if defined(VERTEX)

attribute vec4 a_position;
attribute vec4 a_normal;
attribute vec2 a_texcoord;
attribute vec4 a_color;

void main(void) {

    v_position = u_projectionMatrix *
                 u_modelViewMatrix *
                 a_position;

    v_normal = u_normalMatrix *
    a_normal;

    v_texcoord = a_texcoord;

    v_color = a_color;

    gl_Position = v_position;

}

#else // fragment shader

uniform vec2 u_mouse;
uniform vec2 u_pos;

void main() {

}

#endif
26.
27.
your glslCanvas should look sad and empty now.
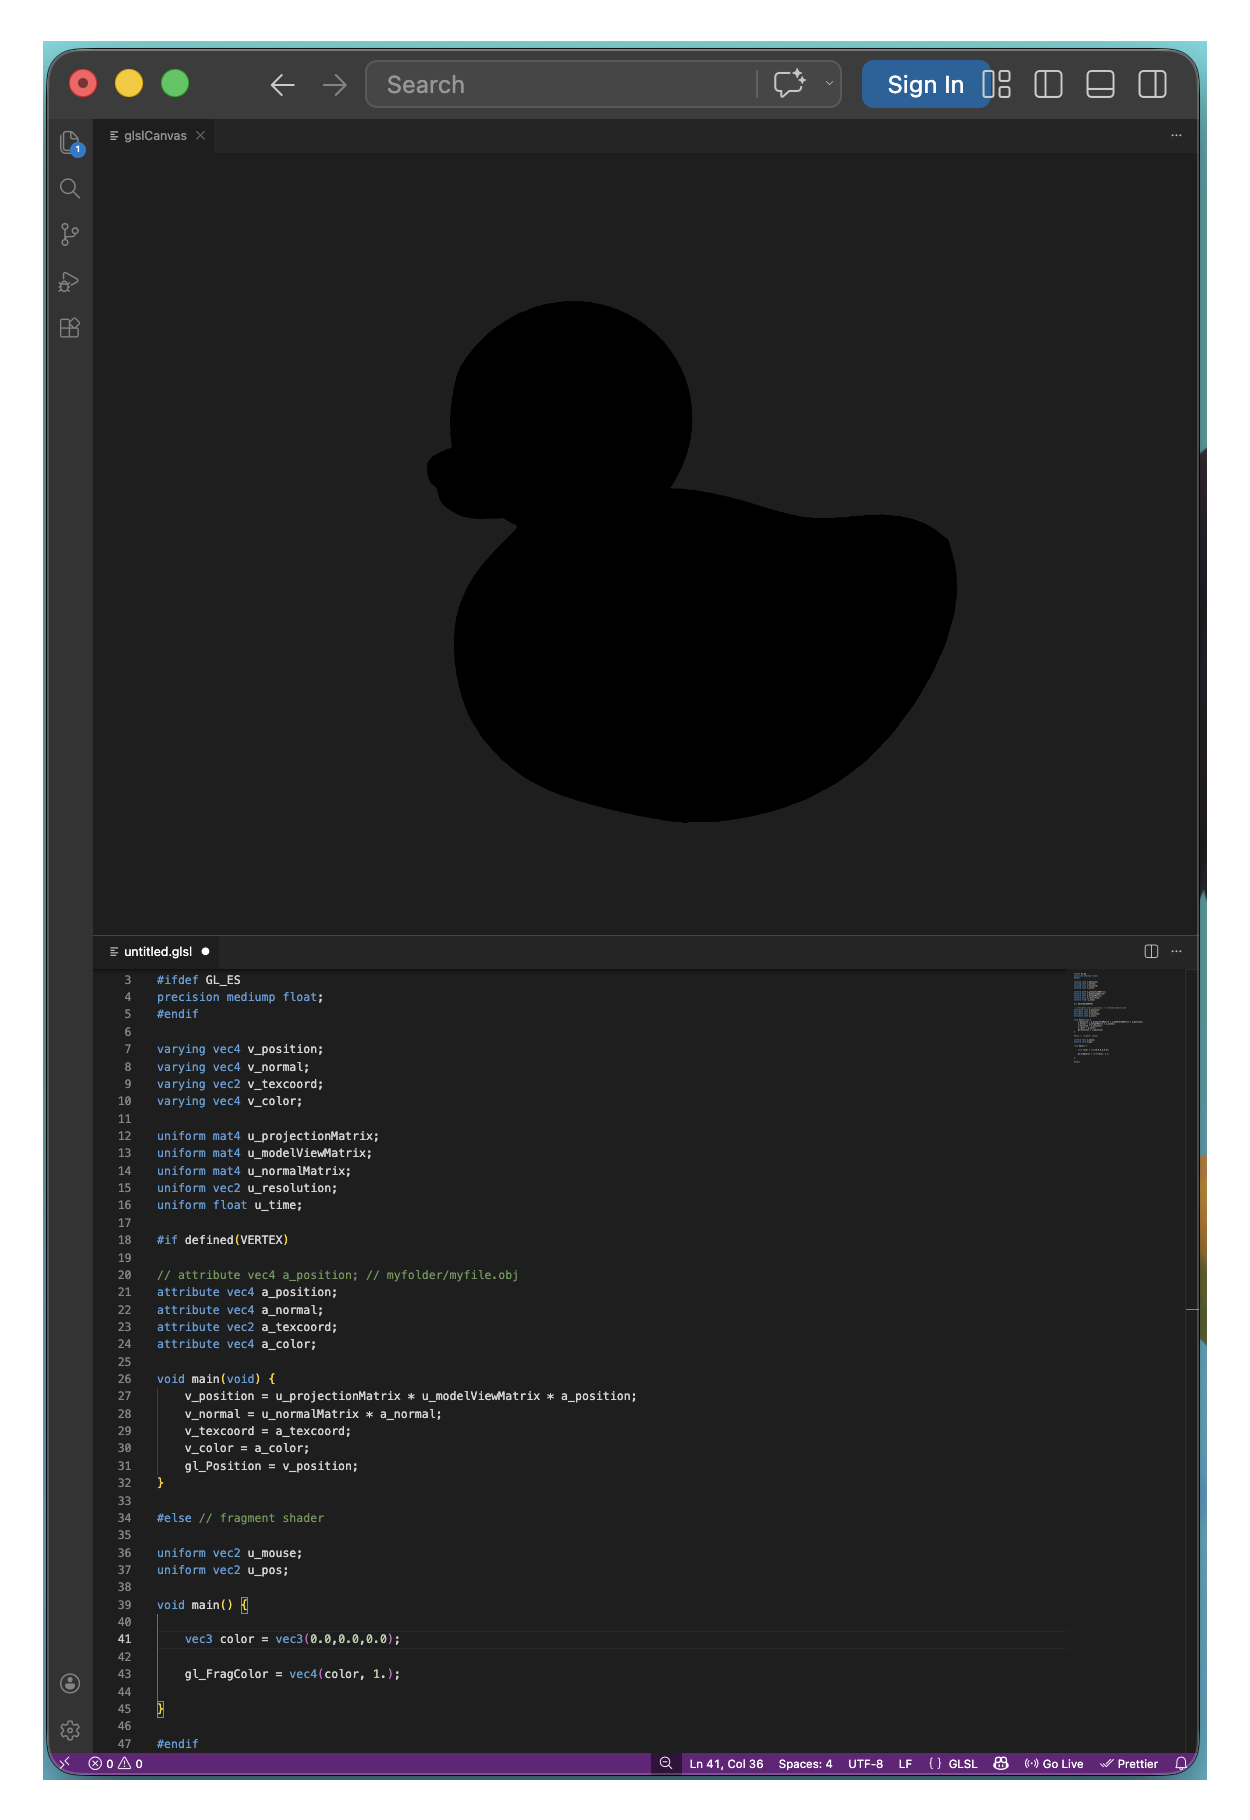
but fear not! you only need two lines to bring back the shape of the rubber duck!
and these lines consist of:
1. setting a colour (it can be any colour, but eventually it will need to be the colour black) with a vec3 variable.
2. setting the vec4 variable gl_FragColor to that colour in a final equation of your final main() function.
you can go ahead and code the following lines in bold, within the curled braces of the second void main function:
28.
void main() {

    vec3 color = vec3(0.0, 0.0, 0.0);

    gl_FragColor = vec4(color, 1.0);

}
29.
okay, so your glsl_Canvas should look like this now. (the duck should have returned, but as a black silhouette.)
let's talk more about those two lines and how they work.
30.
31.
firstly, what is a vec3 and what is a vec4? the way I approach my own process of building a GLSL shader is,
I see it as creating a base of less complicated values, and building them into greater and greater complexity.
a basic GLSL shader progresses from floats and vec2s, to vec3s, and then to a final vec4, your gl_FragColor.
floats and vec4s are rare, and vec2s and vec3s are more common.
you can build vec4s with a combination of vec4s, vec3s, vec2s, and floats.
you can build vec3s with a combination of vec3s, vec2s, and floats.
you can build vec2s with a combination of vec2s, and floats.
you can build floats with floats.
there is a pattern emerging here,
and it is because you are continually gently pushed towards making vectors that are more complex than their individual parts, gradually making bigger and bigger things.
32.
and this is because the last vec4 in the code of a fragment shader (a 2D shader, or the 2D parts of a combined vertex and fragment shader)
is the final equation that determines what you can actually see, within your glslCanvas or applied to your 3D sculpture/scene,
and it is always called gl_FragColor, which is a built into the language variable name that stands for fragment color.
33.
in the first line:
vec3 color = vec3(0.0, 0.0, 0.0);
you are saying to the code editor:
1. you're going to build a vec3.
2. next, you are calling this variable the word color (think of a variable as a container for a value or values).
3. you are using the = symbol to tell the variable that it will now become the value or values you are about to type.
(when a variable takes on a new value or values with an = symbol, any values it held before no longer apply to it at all.
and if a value is a changeable value like u_time (important strobing lights warning in part 35 and 36 of this tutorial for if you want to use u_time in your shaders.), or u_mouse or gl_FragCoord (there are many, many more),
then the colours of the fragment shader will do something very cool.
they will be animated, as, if the value is constantly changing, the mathematics being computed will be constantly changing too.)
4. you are setting the colour (which is a vec3) to black, which is when there is 0.0 red light, 0.0 green light, and 0.0 blue light.
white is 1.0, 1.0, 1.0,
and anything inbetween or any combination of 0.0s or 1.0s is a colour.
if you ever run into a white screen or a black screen, it generally means that your shader is either:
too light for a colourful colour to display (fully white screen),
too dark for a colourful colour to display (fully black screen).
grey means you've encountered a complex error that might be difficult to figure out how to solve,
and an error message is usually a slightly less complex error that can be solved if you puzzle it out, look at more tutorials, or google the error.
5. finally, you finish each = equation with a ; symbol to say, this is a finished line of code.
34.
an important note: GLSL is run completely live. if you input a keypress, your glslCanvas will reset and run your code as whatever it is after the keypress with almost unnoticeable delay.
this is why, when you start to animate a shader, with things like u_time, if you multiply u_time by too high a value, your shader will be animated to run super fast.
this is when you run into the potential problem of strobing/flashing lights.
35.
to avoid any risk of strobing/flashing visuals, try and avoid using u_time.
or, if you like nightclub/concert style visuals, u_time is often the key to making fun strobe-y things.
36.
in the second line:
gl_FragColor = vec4(color, 1.0);
you are saying to the code editor:
1. you are going to use the inbuilt variable gl_FragColor to display your final equation on your screen in your glsl_Canvas.
2. you are using the = symbol again to tell the variable that it will now become the value or values you are about to type.
3. you're going to build a vec4.
4. you are combining the vec3 color that you made in the previous line, with a float value 1.0 to set the opacity/brightness to 1, which is like, 100% basically.
5. finally, you finish each = equation again with a ; symbol to say, this is a finished line of code.
37.
okay, so next up, you might want to try and make the rubber duck a different colour.
to do that, we need to do two things, which are:
1. code some cool colours we can pick and choose from.
2. change the first of the two lines to one of those colours.
38.
the first is pretty simple. here are some of my favourite colours.
(we can put them inbetween:
uniform vec2 u_pos;
and
void main() { )
39.
vec3 color_1red =
vec3(1.0, 0.0, 0.0);

vec3 color_2scarlet =
vec3(1.0, 0.0, 0.2);
vec3 color_3pinkred =
vec3(1.0, 0.0, 0.4);
vec3 color_4electricpink =
vec3(1.0, 0.0, 0.6);
vec3 color_5hotpink =
vec3 (1.0, 0.0, 0.8);

vec3 color_6magenta =
vec3(1.0,0.0,1.0);

vec3 color_7pinkpurple =
vec3(0.8, 0.0, 1.0);
vec3 color_8purplepink =
vec3(0.6, 0.0, 1.0);
vec3 color_9purple =
vec3(0.4, 0.0, 1.0);
vec3 color_10indigo =
vec3(0.2, 0.0, 1.0);

vec3 color_11blue =
vec3 (0.0, 0.0, 1.0);

vec3 color_12cobalt =
vec3(0.0, 0.2, 1.0);
vec3 color_13duskblue =
vec3(0.0, 0.4, 1.0);
vec3 color_14middaysky =
vec3(0.0, 0.6, 1.0);
vec3 color_15aquamarine =
vec3(0.0, 0.8, 1.0);

vec3 color_16cyan =
vec3(0.0, 1.0, 1.0);

vec3 color_17mint =
vec3 (0.0, 1.0, 0.8);
vec3 color_18seagreen =
vec3(0.0, 1.0, 0.6);
vec3 color_19evengreen =
vec3 (0.0, 1.0, 0.4);
vec3 color_20basicgreen =
vec3 (0.0, 1.0, 0.2);

vec3 color_21green =
vec3 (0.0, 1.0, 0.0);

vec3 color_22springgreen =
vec3 (0.2, 1.0, 0.0);
vec3 color_23lime =
vec3 (0.4, 1.0, 0.0);
vec3 color_24fluogreen =
vec3 (0.6, 1.0, 0.0);
vec3 color_25fluoyellow =
vec3 (0.8, 1.0, 0.0);

vec3 color_26yellow =
vec3 (1.0, 1.0, 0.0);

vec3 color_27honey =
vec3 (1.0, 0.8, 0.0);
vec3 color_28gold =
vec3 (1.0, 0.6, 0.0);
vec3 color_29tangerine =
vec3 (1.0, 0.4, 0.0);
vec3 color_30sunset =
vec3 (1.0, 0.2, 0.0);
40.
now, we only need to change:
vec3 color = vec3(0.0, 0.0, 0.0);
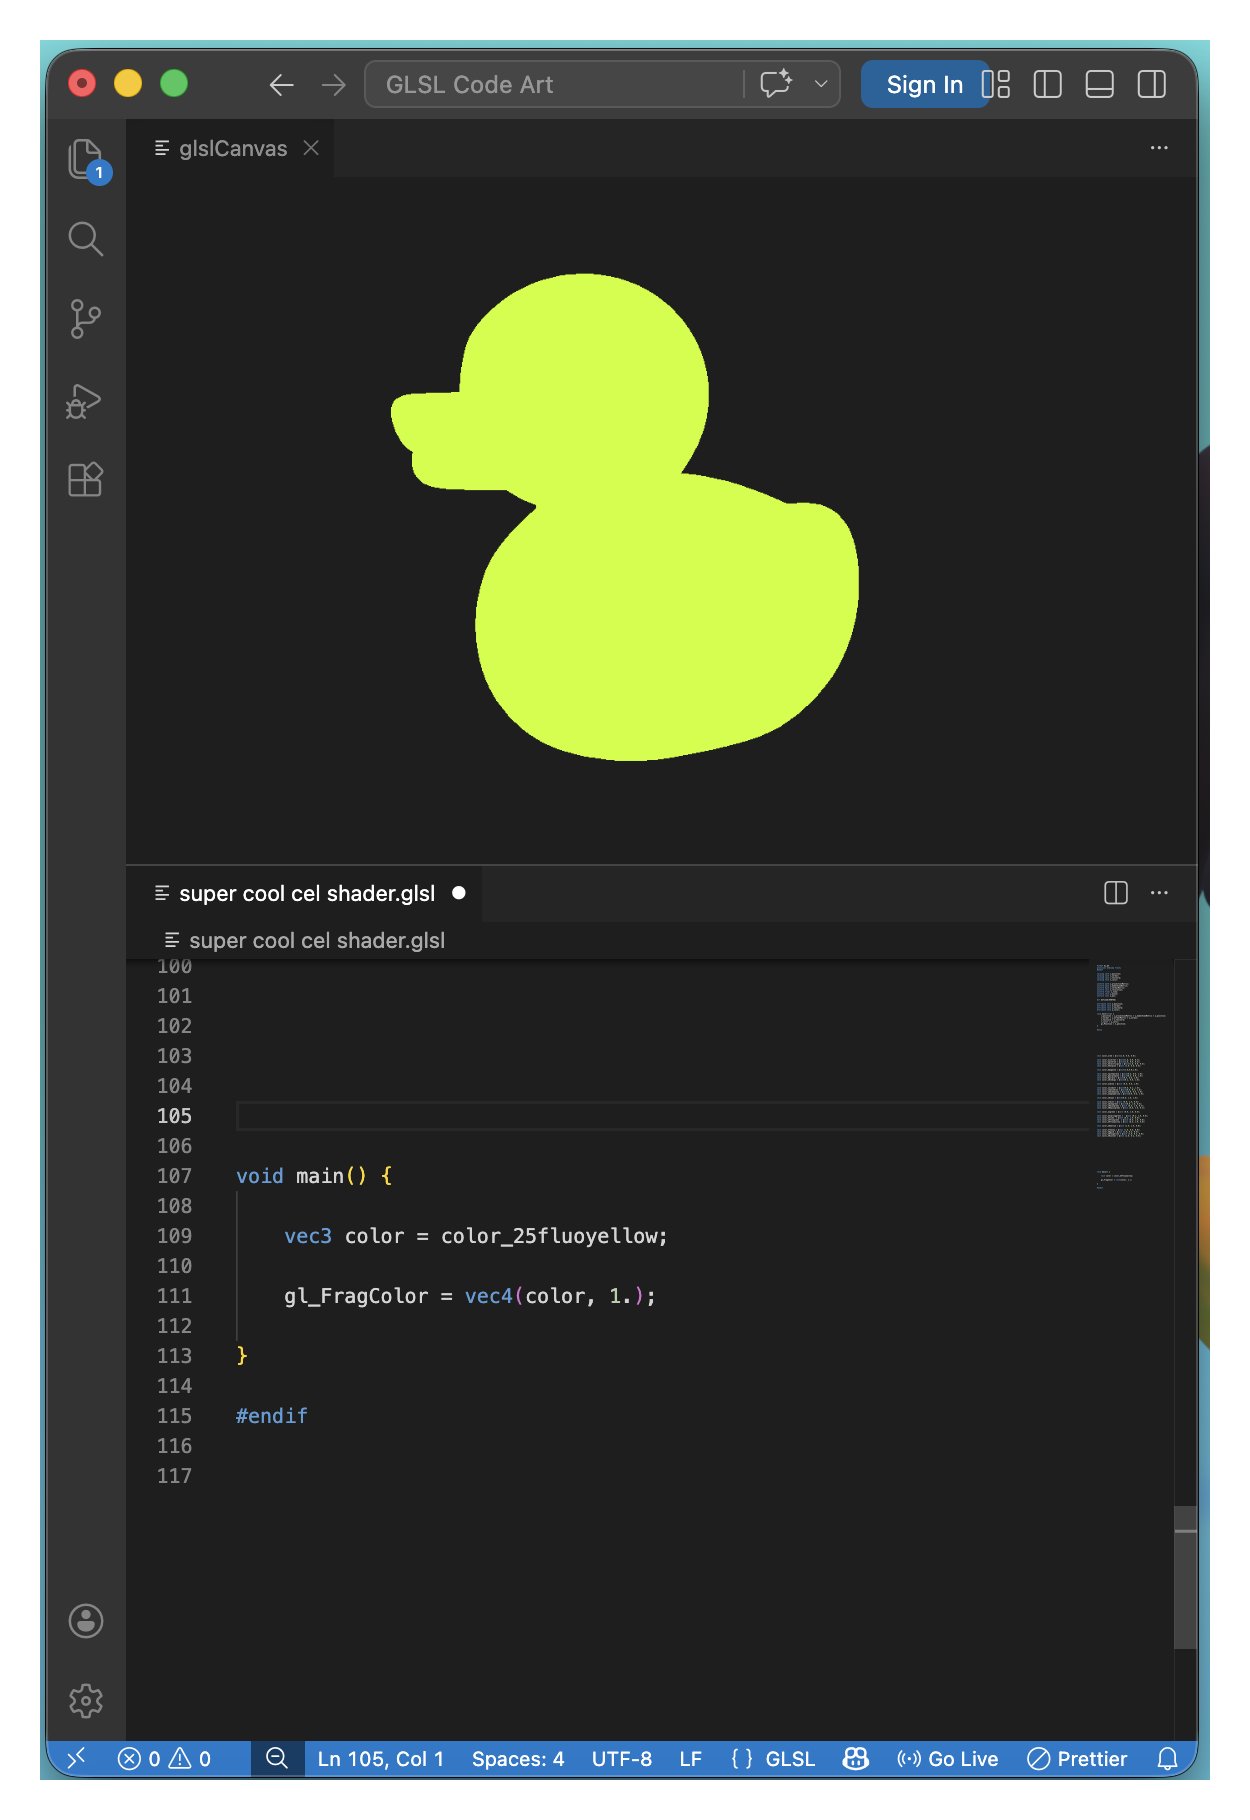
to a colour of your choice. I've chosen color_25fluoyellow, like so:
vec3 color = vec3(color_25fluoyellow);
41.
so now your glslCanvas should look like this, funky and fluorescent yellow.
42.
43.
next, you're going to want the rubber duck to look, perhaps, more interesting than a single block colour.
44.
let's introduce a cartesian coordinate system to add visual interest.
cartesian coordinates in GLSL specifically, give you a way of exploring a rainbow of colour within the scope of your device's screen.
the further the location the pixel is to the right, the greater the x value it will hold.
the higher up a pixel is, the greater the y value it will hold.
45.
and when you swizzle with x and y values, (so, say, adding .x at the end of a variable name, like color.x, gl_FragCoord.xy, or u_resolution.yx or whatever you wish),
that location of a pixel's position on an axis, when put through a mathematical equation like floor or fract (more on those soon. there are also lots of others),
changes the colour and visually defines the shape of any lines or curves of colour that appear.
46.
the book of shaders website has a really handy glossary to see what patterns you can make, I refer to it frequently because when it comes to maths, I am forgetful.
thebookofshaders.com/glossary
47.
the further you get into GLSL and playing around with beautiful mathematics, the more actually understanding the maths becomes key,
but it is also very valid to just open up a code editor and throw equations in and be like, ooooooh, how does it do that?
that was legitimately me for many years and I got so much fun out of it,
but it was frustrating whenever I hit the roadblock of not knowing what values to change to get the colours and shapes to do what I wanted them to.
48.
the last thing, and perhaps the most exciting thing, about cartesian coordinates, before we code a cool cartesian coordinate system in our GLSL:
a cartesian coordinate system in GLSL doesn't just select a single pixel and change the colour of it.
due to how GLSL works on a GPU, (the graphics processing unit of a device), and not a CPU (which has very few cores in comparison),
processing of pixel locations happens pretty much all at the same time.
this rapid processing means once you code a basic cartesian coordinate system, it gets all the pixels on the screen (u_resolution.xy)
and basically, matches them up to the colours calculated from the equations you enter (gl_FragCoord.xy).
49.
the most basic cartesian coordinate system is:
vec2 cartesian_coordinates = gl_FragCoord.xy/u_resolution.xy;
50.
this divides the screen's fragment coordinates,
by the resolution of the screen, mapping them so that each pixel can be modified to change colour.
and we place this coord system immediately after void main() {
within the two curled braces, after the first one, and before the last one.
your void main() code should now look like this:
51.
void main() {

    vec2 cartesian_coordinates =
    gl_FragCoord.xy/
    u_resolution.xy;

    vec3 color =
    vec3(color_25fluoyellow);

    vec4 gl_FragColor =
    vec4(color, 1.0);

}
52.
the cel shader needs a coordinate system that's a bit more complex however.
so let's change that simple coordinate system to:
vec2 cartesian_coordinates =
fract(gl_FragCoord.xy/
u_resolution.xy) +
fract(gl_FragCoord.xy/
u_resolution.xy);
53.
you don't need to decipher all of the maths in this line, but it's a good idea to know what the fract mathematical operator does,
and what the floor mathematical operator does, because fract is a more complex form of floor.
there are guides here:
thebookofshaders.com/glossary/?search=floor
thebookofshaders.com/glossary/?search=fract
but my best explanation is that floor takes a number and returns an integer (so a value without a decimal point), by rounding down any number that;s not an integer (so any decimal point), down to the nearest integer less than the value).
floor(1.0) becomes 1.
floor(2.0) becomes 2.
floor(1.4) becomes 1.
and floor(1.7) becomes 1.
and fract returns the floating point in a floor that usually just doesn't get used.
fract(1.0) becomes 0.0.
fract(2.0) becomes 0.0.
fract(1.4) becomes 0.4.
fract(1.7) becomes 0.7.
54.
for this cartesian coordinate system to show up in the final gl_FragColor equation, we need to make sure it is included in the equation.
there are different approaches for doing this, but one way is to change the value of the color variable created earlier to include the cartesian_coordinates variable.
we can do this like so, (and let's also include the absolute of color for fun visuals.)
(the absolute is explained best here:
thebookofshaders.com/glossary/?search=abs).
a summary of the absolute is that it's a value's distance from 0.
abs(0) becomes 0.
abs(1) becomes 1.
abs(-1) becomes 1.
55.
(I forgot to add this bit in the original April 2026 version of the tutorial, so here I am in July, adding it in because I am silly. :P)
the cel shader also needs a bit of extra code magic to display a cool gradient with four different coloured quadrants.
so here's an extra line to add in, in-between the initial color variable, and the gl_FragColor final composition.
color = vec3(cartesian_coordinates.x,
cartesian_coordinates.y, abs(color) );
56.
and now your rubber duck should hopefully look like this, and also, if you switch back to the flat 2D plane, it should look like a nice pastel gradient.
57.
58.
59.
your code should also now look like these following three segments of code, but all in one text file.
60.
#ifdef GL_ES
precision mediump float;
#endif

varying vec4 v_position;
varying vec4 v_normal;
varying vec2 v_texcoord;
varying vec4 v_color;

uniform mat4 u_projectionMatrix;
uniform mat4 u_modelViewMatrix;
uniform mat4 u_normalMatrix;
uniform vec2 u_resolution;
uniform float u_time;

#if defined(VERTEX)

attribute vec4 a_position;
attribute vec4 a_normal;
attribute vec2 a_texcoord;
attribute vec4 a_color;

void main(void) {

    v_position =
    u_projectionMatrix *
    u_modelViewMatrix *
    a_position;

    v_normal = u_normalMatrix *
    a_normal;

    v_texcoord = a_texcoord;

    v_color = a_color;

    gl_Position = v_position;

}

//...
61.
            //...

#else

uniform vec2 u_mouse;
uniform vec2 u_pos;

vec3 color_1red =
vec3(1.0, 0.0, 0.0);

vec3 color_2scarlet =
vec3(1.0, 0.0, 0.2);
vec3 color_3pinkred =
vec3(1.0, 0.0, 0.4);
vec3 color_4electricpink =
vec3(1.0, 0.0, 0.6);
vec3 color_5hotpink =
vec3 (1.0, 0.0, 0.8);

vec3 color_6magenta =
vec3(1.0,0.0,1.0);

vec3 color_7pinkpurple =
vec3(0.8, 0.0, 1.0);
vec3 color_8purplepink =
vec3(0.6, 0.0, 1.0);
vec3 color_9purple =
vec3(0.4, 0.0, 1.0);
vec3 color_10indigo =
vec3(0.2, 0.0, 1.0);

vec3 color_11blue =
vec3 (0.0, 0.0, 1.0);

vec3 color_12cobalt =
vec3(0.0, 0.2, 1.0);
vec3 color_13duskblue =
vec3(0.0, 0.4, 1.0);
vec3 color_14middaysky =
vec3(0.0, 0.6, 1.0);
vec3 color_15aquamarine =
vec3(0.0, 0.8, 1.0);

vec3 color_16cyan =
vec3(0.0, 1.0, 1.0);

vec3 color_17mint =
vec3 (0.0, 1.0, 0.8);
vec3 color_18seagreen =
vec3(0.0, 1.0, 0.6);
vec3 color_19evengreen =
vec3 (0.0, 1.0, 0.4);
vec3 color_20basicgreen =
vec3 (0.0, 1.0, 0.2);

vec3 color_21green =
vec3 (0.0, 1.0, 0.0);

vec3 color_22springgreen =
vec3 (0.2, 1.0, 0.0);
vec3 color_23lime  =
vec3 (0.4, 1.0, 0.0);
vec3 color_24fluogreen  =
vec3 (0.6, 1.0, 0.0);
vec3 color_25fluoyellow =
vec3 (0.8, 1.0, 0.0);

vec3 color_26yellow =
vec3 (1.0, 1.0, 0.0);

vec3 color_27honey =
vec3 (1.0, 0.8, 0.0);
vec3 color_28gold =
vec3 (1.0, 0.6, 0.0);
vec3 color_29tangerine =
vec3 (1.0, 0.4, 0.0);
vec3 color_30sunset =
vec3 (1.0, 0.2, 0.0);

//...
62.
//...

void main() {

    vec2 cartesian_coordinates =
    fract(gl_FragCoord.xy/
    u_resolution.xy) +
    fract(gl_FragCoord.xy/
    u_resolution.xy);

    vec3 color =
    vec3(color_25fluoyellow);

    color = vec3(cartesian_coordinates.x,
    cartesian_coordinates.y, abs(color) );

    vec4 gl_FragColor =
    vec4(color, 1.0);

}

#endif
63.
I'm a bit tired now, so this is the end of part one of this 3D GLSL shader tutorial.
hopefully you learnt some cool code magic in this part one of my tutorial to build a cel shader with code!
if you found it useful, or if you have any feedback, if it was too difficult or too simple or if there's anything you want me to cover next time or any mistakes I've made, let me know:
I'm not 100% sure of my target audience yet,
but I think I want to mostly create content for people beginning or wanting to begin their indie game dev journey.
I'm going to be trying to make and upload the second part of this tutorial, to publish sometime this month also (April 2026.)
happy coding!
Logan :]
(code tutorial updated: 14/07/26.
- added extra code that makes the gradient with the four different coloured quadrants, actually work.
- I recently realised that I didn't leave any way to get in touch if anyone has any feedback, because I am silly. so, at some point soon I'll set up an email and maybe some sort of social media page.
- I edited how the start of the tutorial looks, adding a video of what the finished shader will look like,
and also slightly condensing the red text content warning into one text box rather than two to improve the clarity of tutorial layout.
the content warning is still bold and visible, it just looks less scruffy layout wise.
(code tutorial last updated: 15/07/26.
- removed 'vec4' that was previously before gl_FragColor, stopping the GLSL code from functioning.)
This is the finish line of the first part of my first Indie Game Dev/VFX/Code Art tutorial!
Learn about how to go from exploring 2D GLSL fragment shaders,
to embarking upon crafting 3D GLSL vertex shaders in the second half of the tutorial.